
Subtitles can be necessary for different reasons, including:
- Understanding fast-paced dialogue: Subtitles help you follow along with the characters’ conversations, especially when they speak quickly.
- Enhancing clarity in challenging audio situations: In scenes with background noise, whispers, or unclear audio, subtitles ensure that you don’t miss any important information.
- Watching content in noisy environments or with low volume: If you find yourself in a noisy environment or need to keep the volume low, subtitles enable you to still enjoy the movie or show.
- Watching foreign movies: Subtitles are especially valuable when watching movies in languages that are unfamiliar to you.
There are multiple methods to get subtitles on Kodi. You can either add them from the official Kodi repository or install a third-party addon that offers a wide range of subtitle services. It’s up to you to choose what method you can use.
Attention FireStick Users!
Constant surveillance by governments and internet service providers (ISP) is a reality when you’re online. Streaming content online using your personal IP address: 68.65.122.36 can lead to trouble.
I highly recommend using ExpressVPN to hide your IP address while streaming on your FireStick.
It’s not only blazing fast but also incredibly secure. Installing it on your device is a breeze and the best part? You get a 30-day money-back guarantee, no questions asked. Plus, ExpressVPN is currently running an amazing deal where you get 3 extra months free with their yearly plan!
Stay safe, stay secure, and enjoy your streaming without worries. Get ExpressVPN today!
Read: How to Install and Use ExpressVPN on FireStick(Step by Step Guide)
How to Install Subtitles on Kodi Using the Official Kodi Repository?
In the official Kodi repository, you will discover numerous subtitle addons associated with various subtitle services. Unfortunately, many of them are not working properly. To save you trouble, we have handpicked two subtitle addons known to work flawlessly:
- OpenSubtitles.org addon and
- OpenSubtitles.com addon
How to Get Kodi Subtitles Using OpenSubtitles.org Addon
The Opensubtitles.org addon on Kodi offers a simple way to access the Opensubtitles.org website without leaving the Kodi interface.
This integration allows you to effortlessly download subtitles in nearly any language for the movie or TV show you watch.
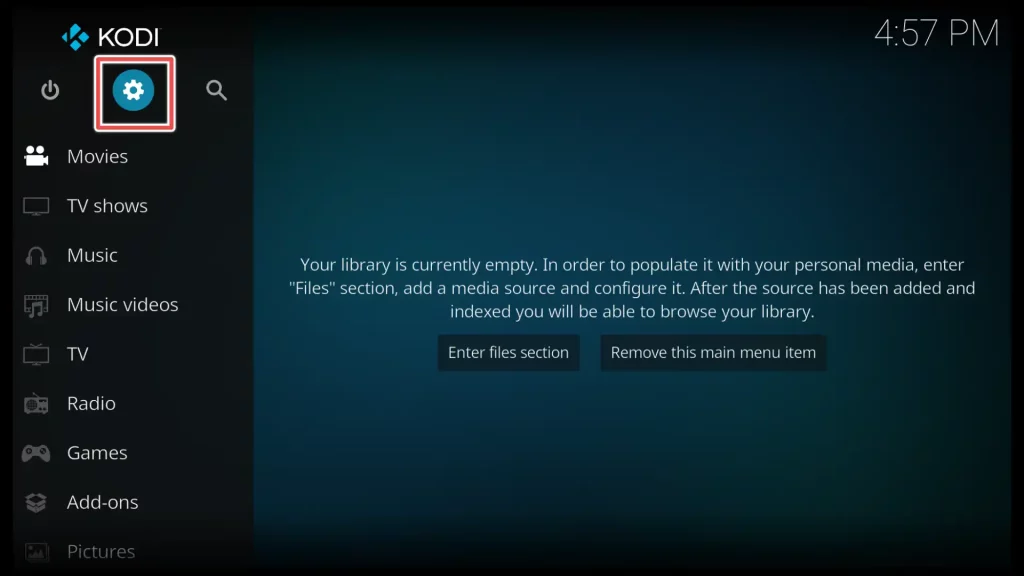
1. To access the settings, click on the gear button located in the top-left corner below the Kodi logo.
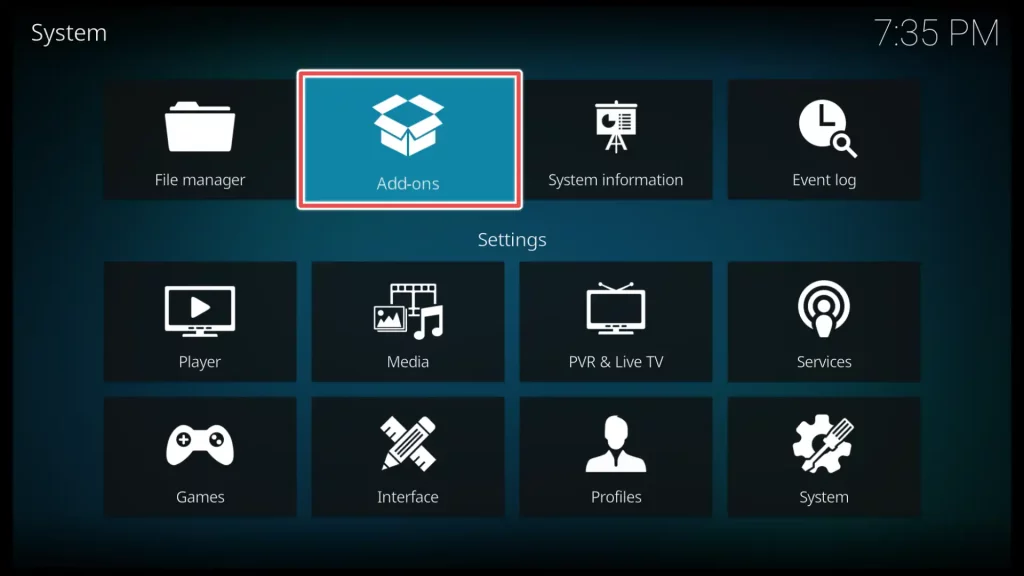
2. Select the Add-ons section.
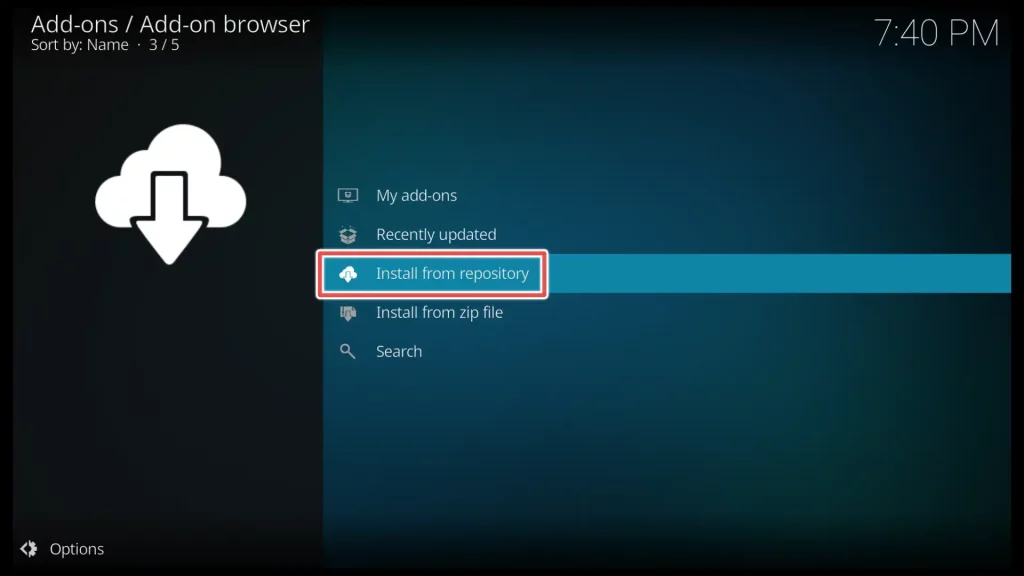
3. Click on Install from repository.
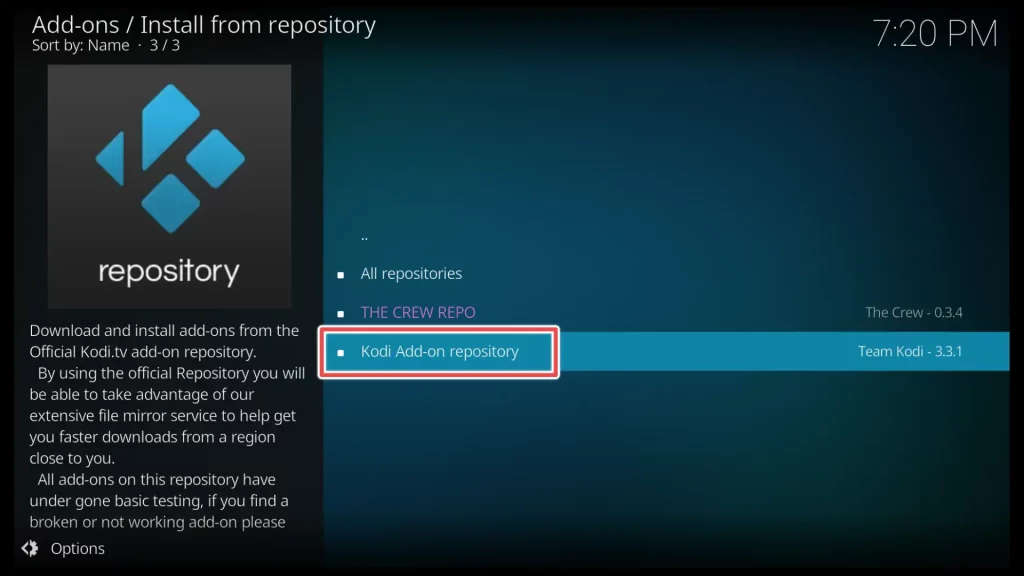
4. Select Kodi Add-on Repository.
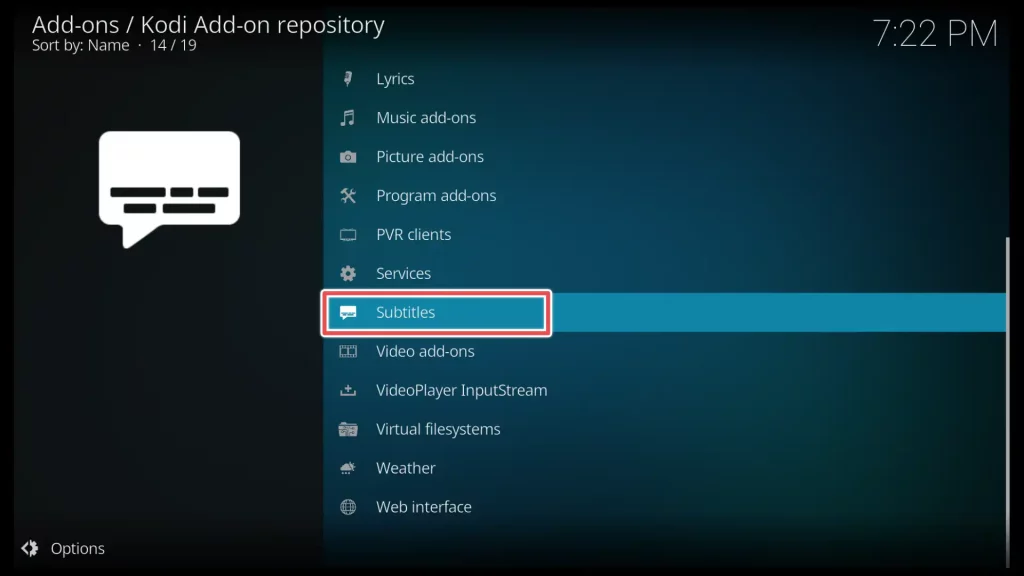
5. Scroll down until you find Subtitles, and click on it.
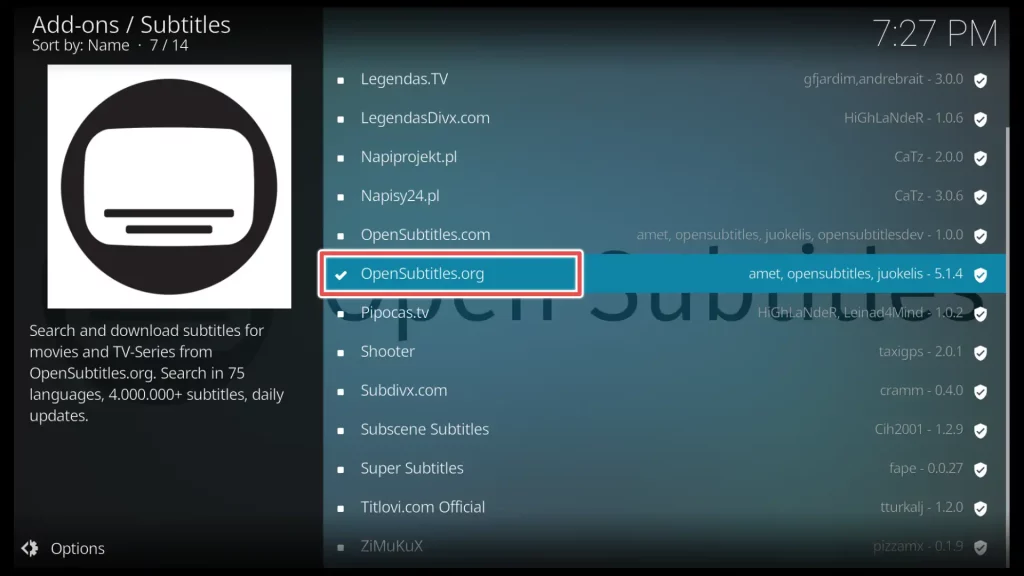
6. Now select the OpenSubtitles.org addon.
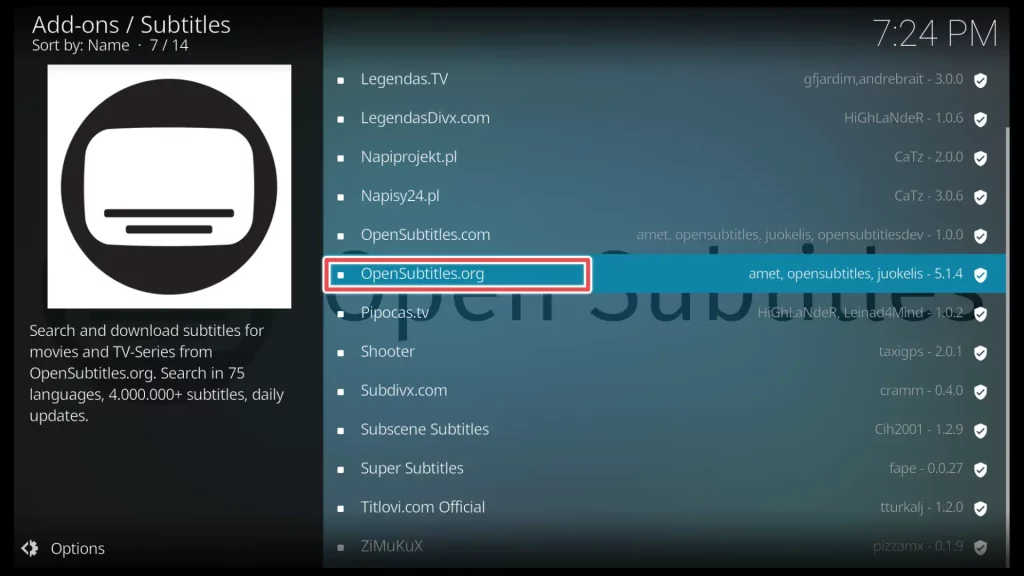
7. Now select the OpenSubtitles.org addon.
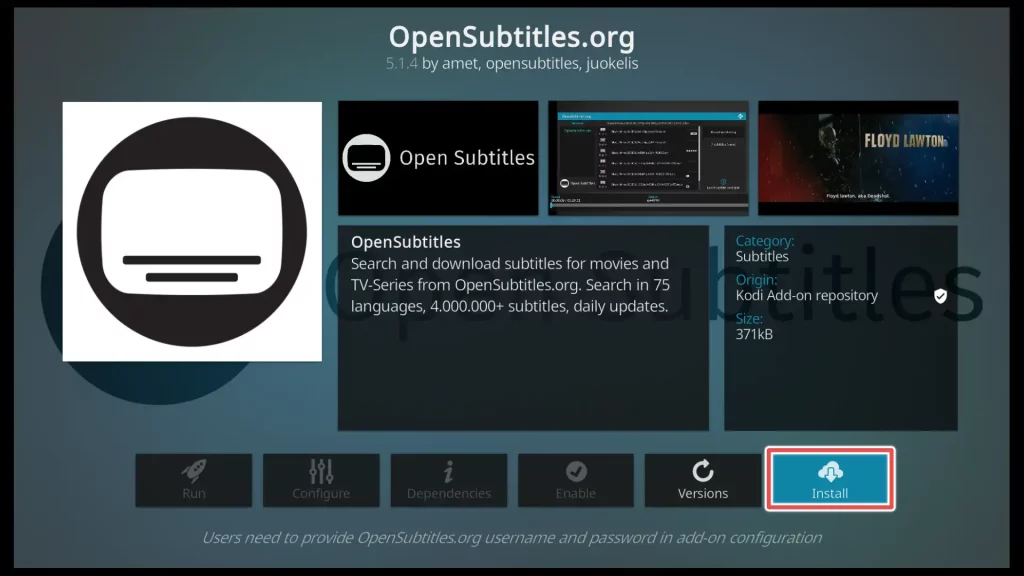
8. Install the OpenSubtitles.org Kodi addon.
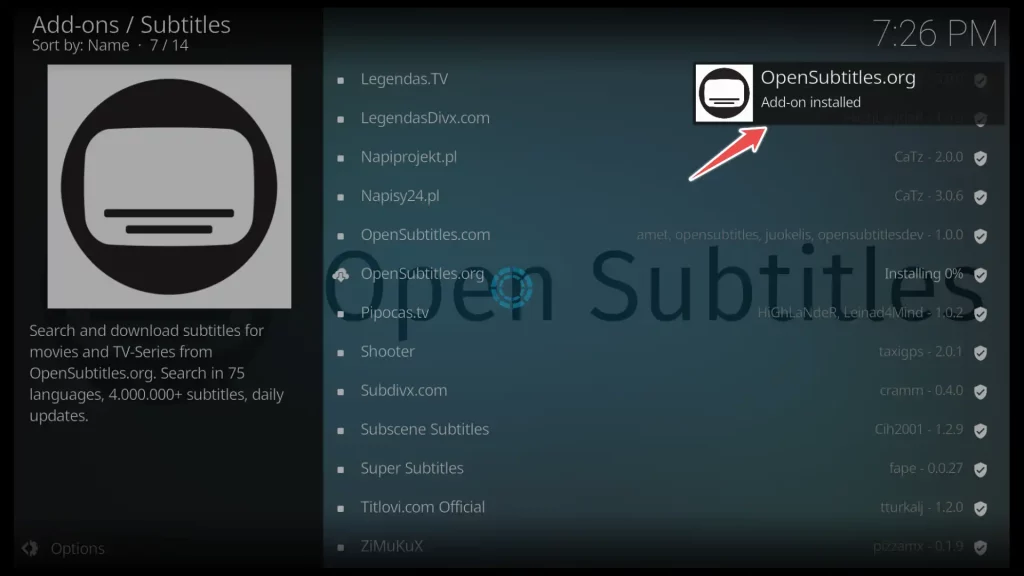
9. Once the installation is complete, you will receive a notification.
10. Now, click on OpenSubtitles.org once again.
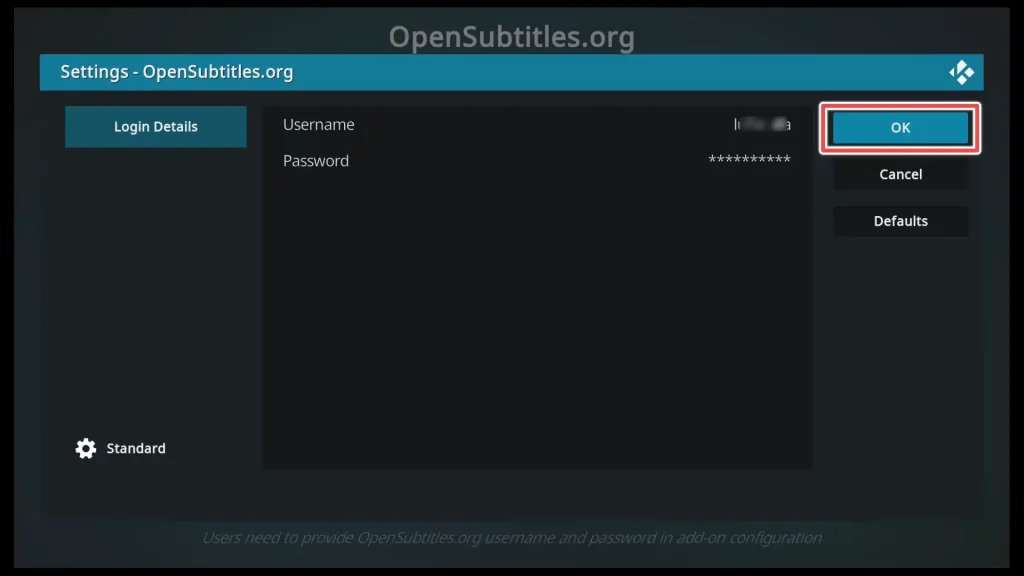
11. Clicking on the Configure button will direct you to the login details window for opensubtitles.org.

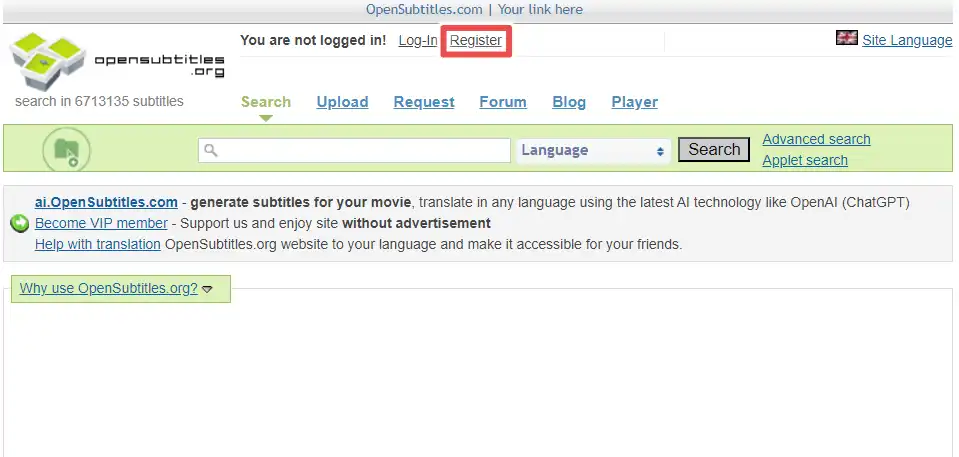
12. If you haven’t registered on OpenSubtitles.org yet, please visit the website and complete the registration process. The process is straightforward, and It shouldn’t take much of your time.
13. Now, enter your login details (username and password) from OpenSubtitles.org and click OK.
That’s it! You have successfully connected your Kodi with OpenSubtitles.org subtitle services.
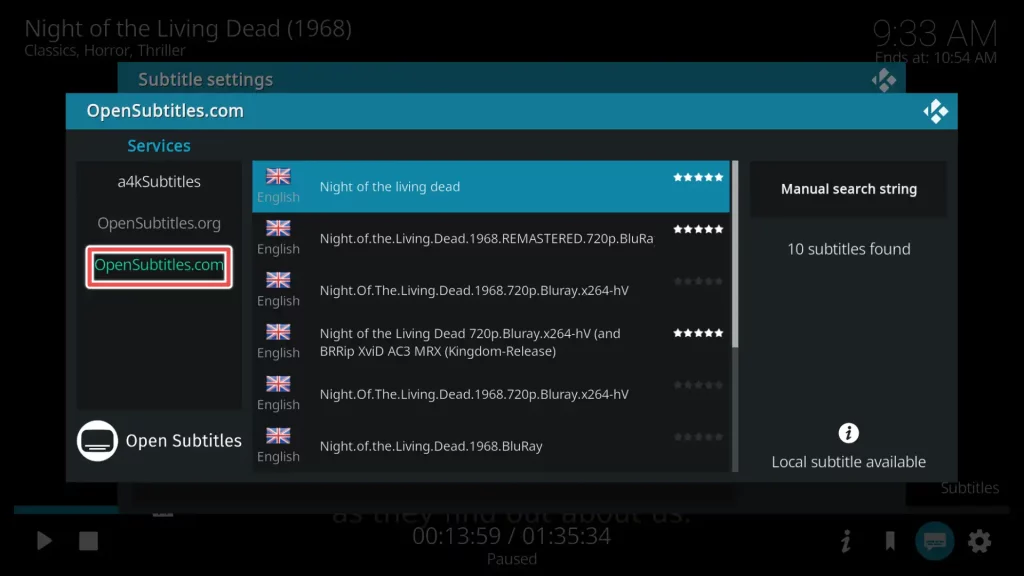
How to Get Kodi Subtitles Using OpenSubtitles.com?
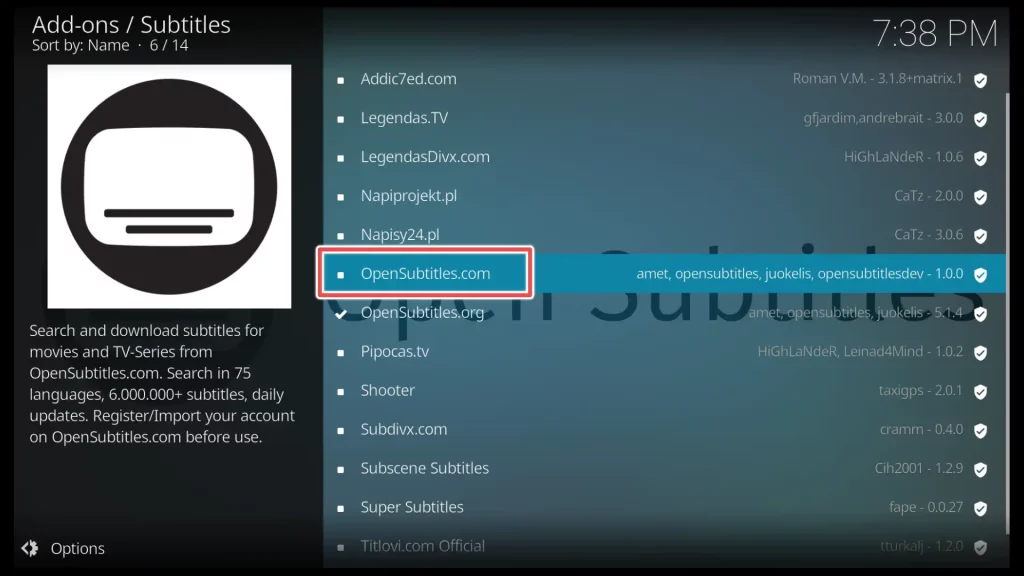
1. While we’re in the subtitles add-ons section, we can also install the OpenSubtitles.com add-on, which is located above OpenSubtitles.org. Just click on it.
2. Click on Install to install the addon.
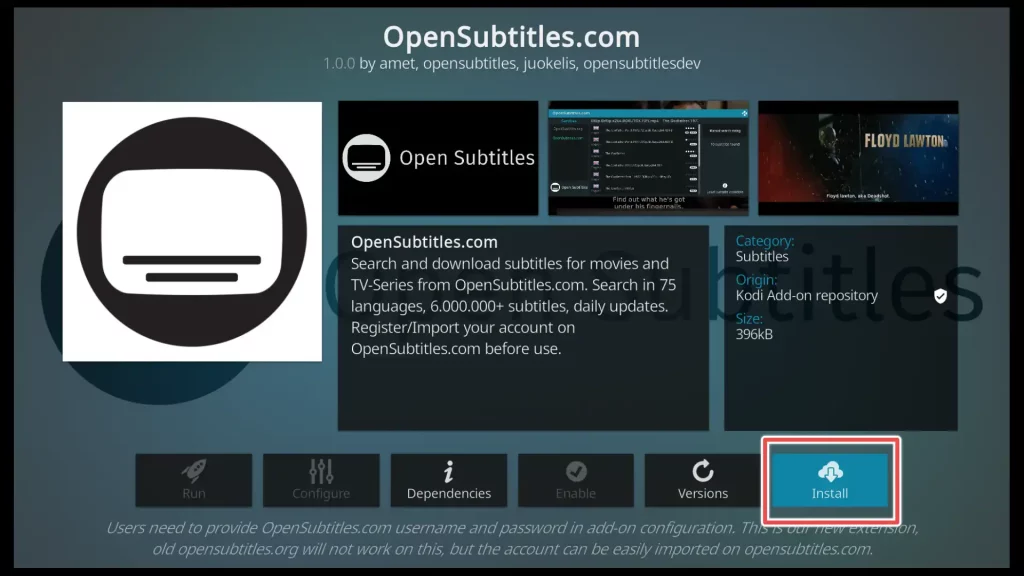
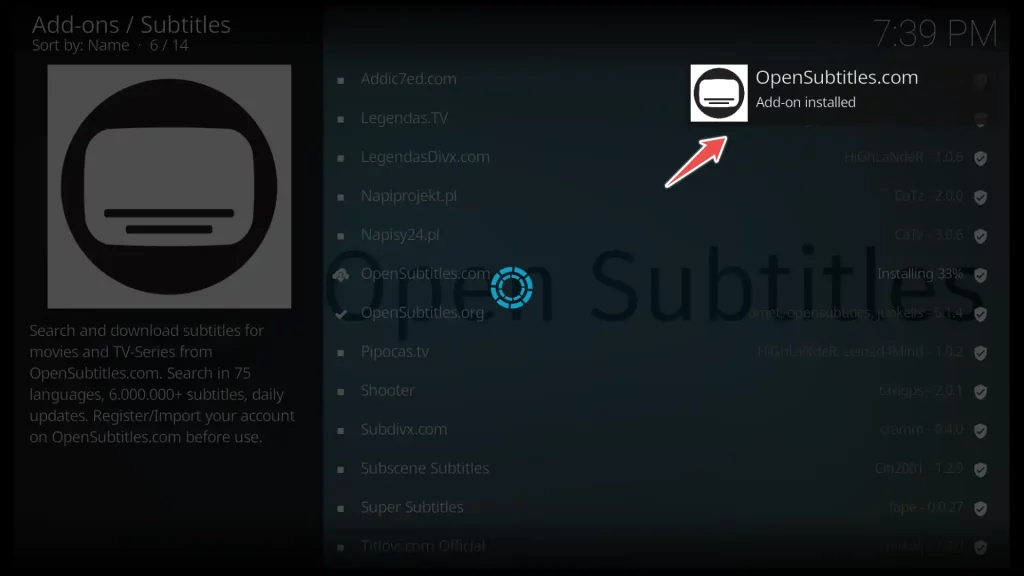
3. Now, please wait for the notification confirming the successful installation of the OpenSubtitles.com addon.
I have tested the Opensubtitles.com add-on, and it functions smoothly without the need for login details from the OpenSubtitles.com website.
It is up to you whether you want to enter your credentials, just as we did with OpenSubtitles.org.
How to Get Kodi Subtitles Using Third-Party Add-on?
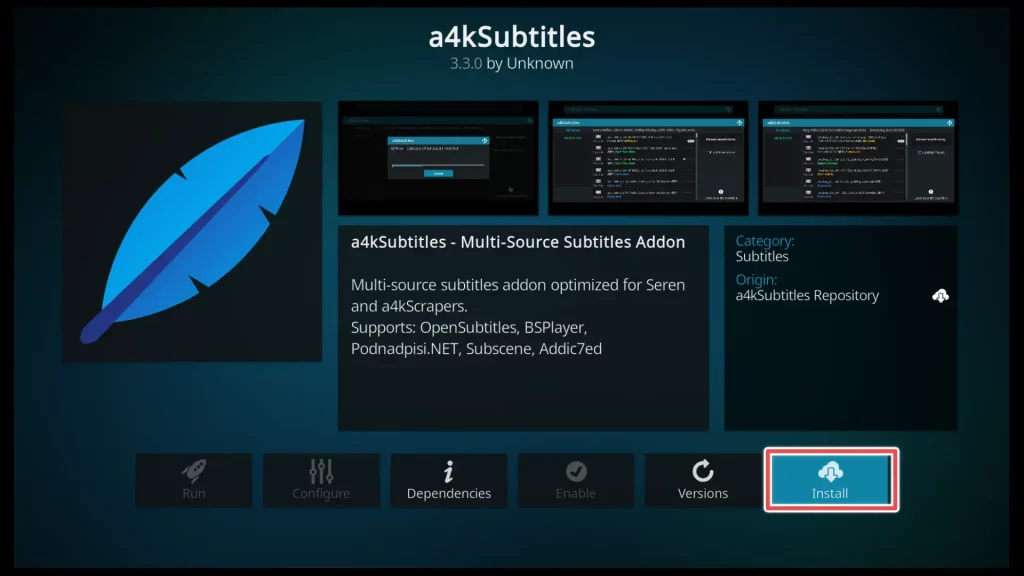
For this guide, we have decided to install the a4kSubtitles add-on also.
The a4kSubtitles add-on is a third-party addon that supports multiple subtitle services such as OpenSubtitles, BSPlayer, Podnapisi, Subscene, and Addic7ed. In other words, you have five addons combined into one.
Since the a4kSubtitles add-on is a third-party addon, you need to enable Kodi to allow installation from Unknown Sources first.
So let’s do that first!
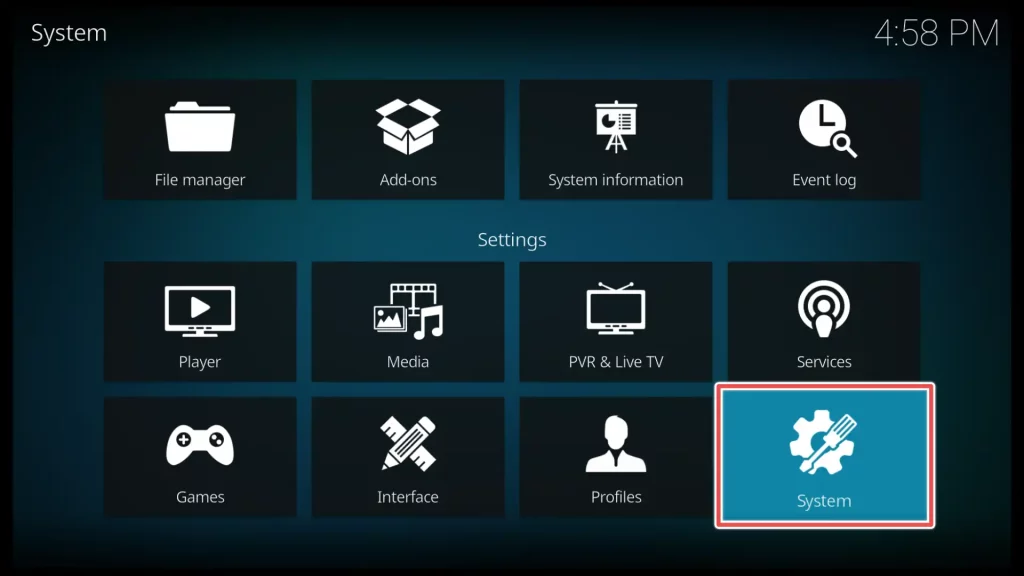
1. Navigate to Kodi’s home screen and click on the cog icon.
2. Please locate the System option in the lower-right corner of your screen and click on it to open the menu.
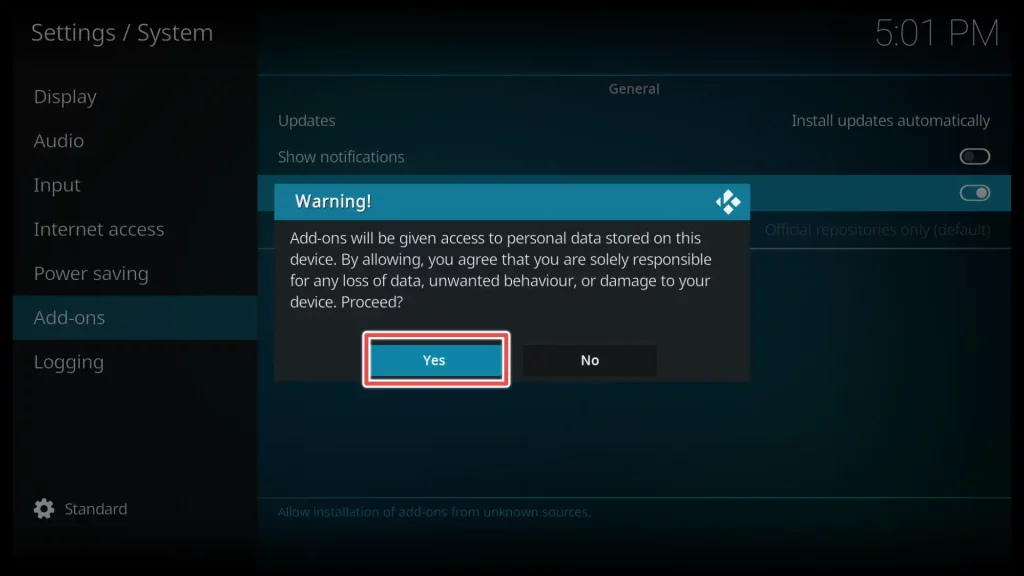
3. Scroll down to the Add-ons menu on the left side of the window. Within the menu, find the option called Unknown Sources. If the Unknown Sources option is currently disabled or turned OFF, simply toggle it to enable or turn it ON.
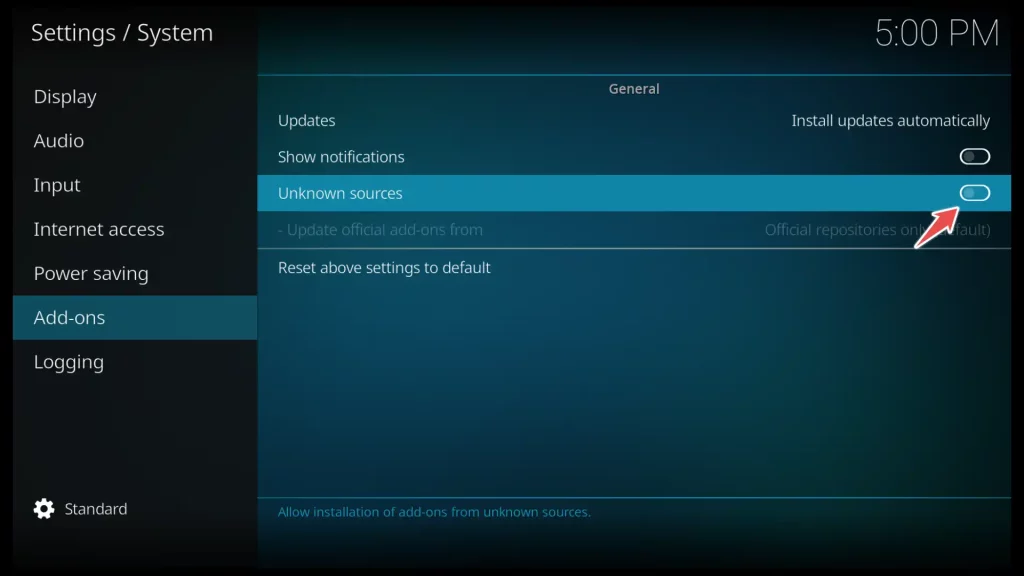
4. Click on Yes to confirm the action.
5. Now, return to the System menu and select the File Manager section.
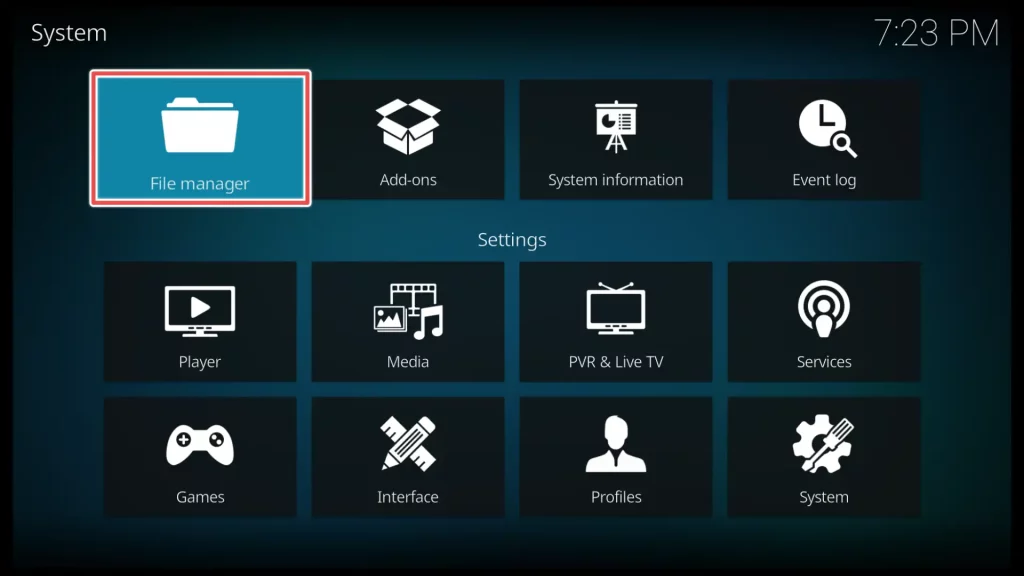
6. Scroll down to the Add source option and click on it.

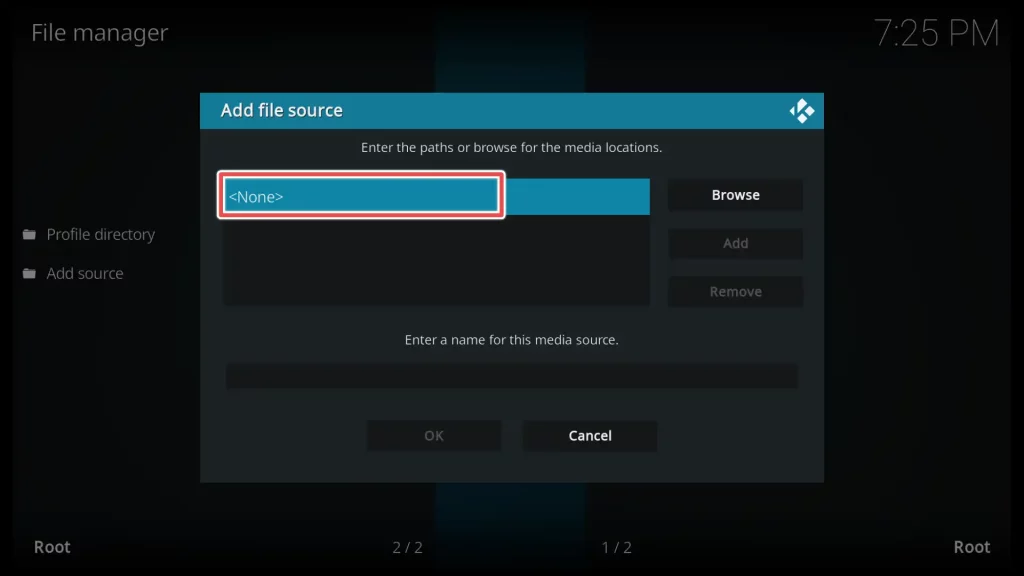
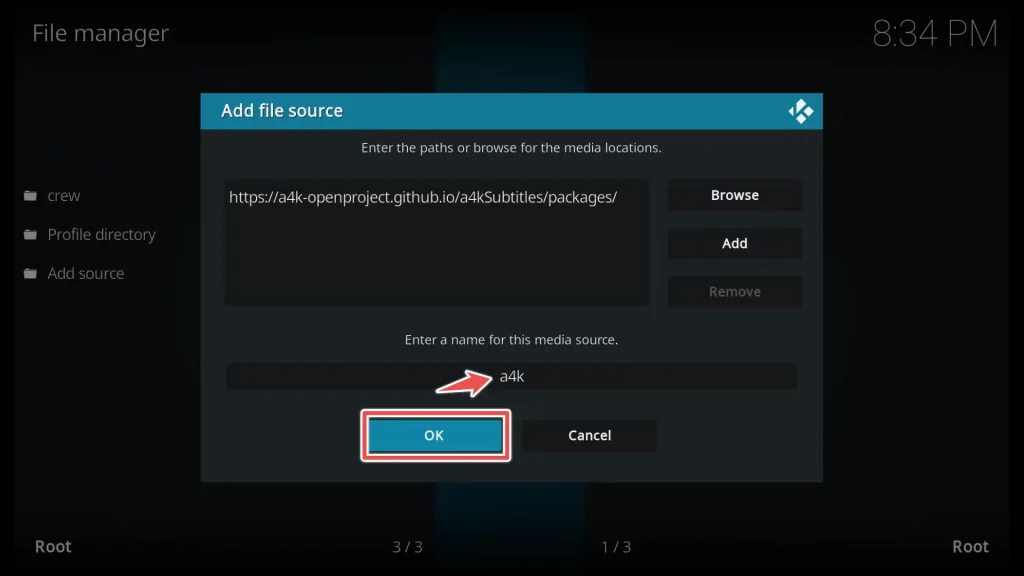
7. Click on <None> to enter the URL that leads to the a4kSubtitles repository.
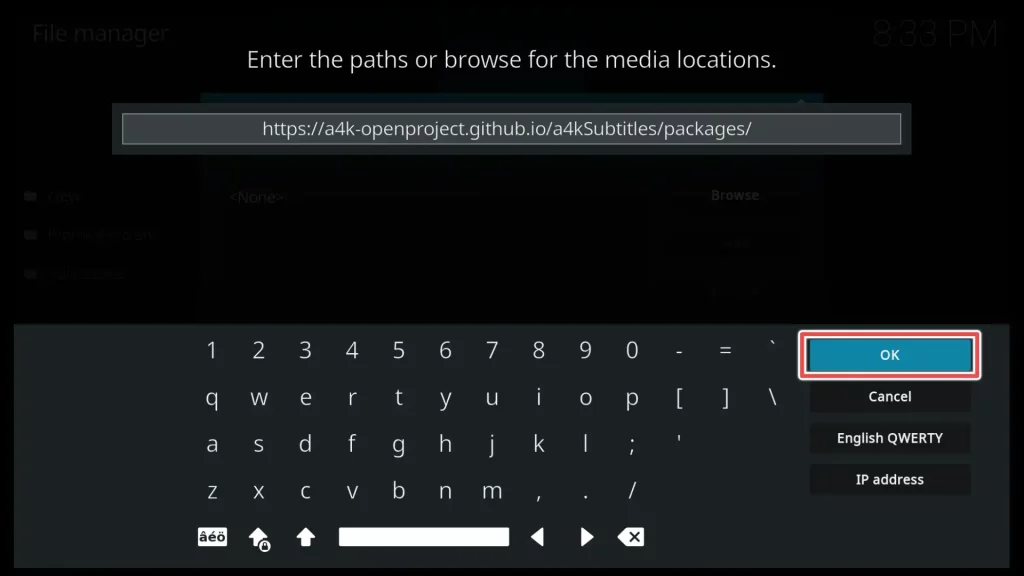
8. Enter the following URL: https://a4k-openproject.github.io/a4kSubtitles/packages/ on the on-screen keyboard and click OK.
9. Provide a name for the repository of your choice an click OK again.
10. Return to the Settings menu and choose the Add-ons section.
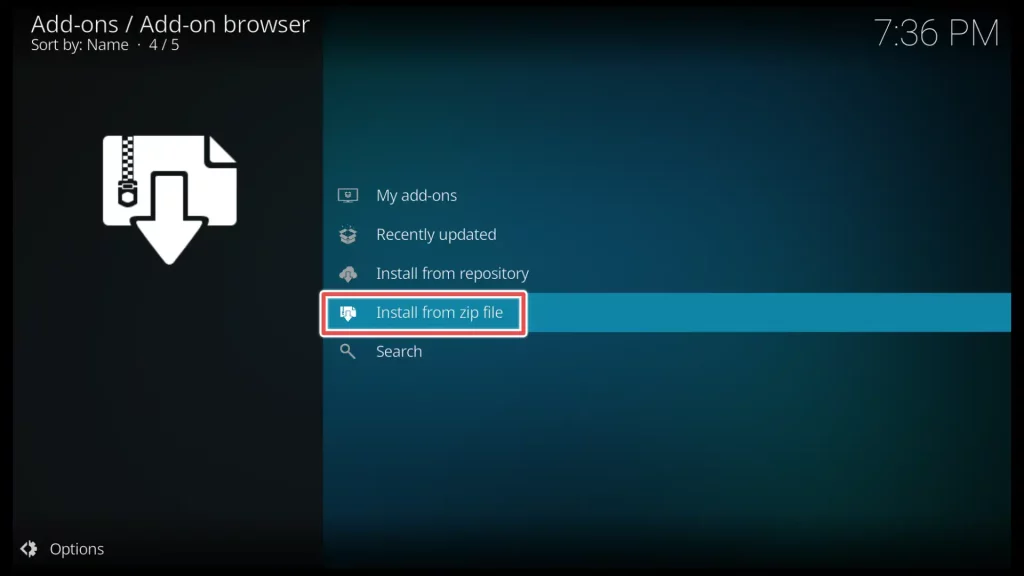
11. Click on Install from zip file.
12. Open the a4ksubtitles source.
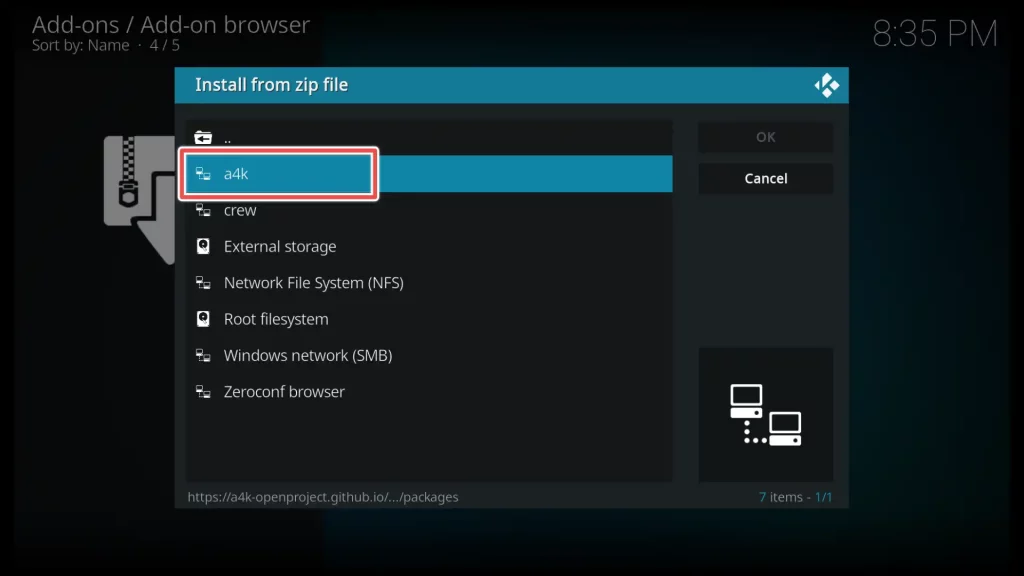
13. Now, proceed to install the a4kSubtitles repository by clicking on a4kSubtitles-repository.zip.

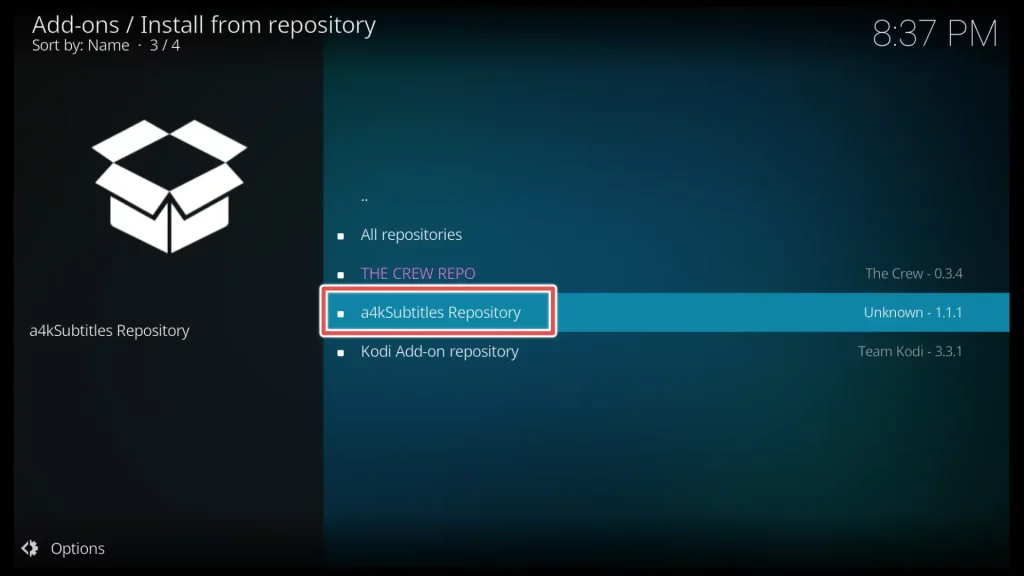
14. Now that you have installed the repository, go back to the Add-ons menu and select Install from repository.
15. Open the a4kSubtitles Addon repository that you have installed.
16. Click on Subtitles.
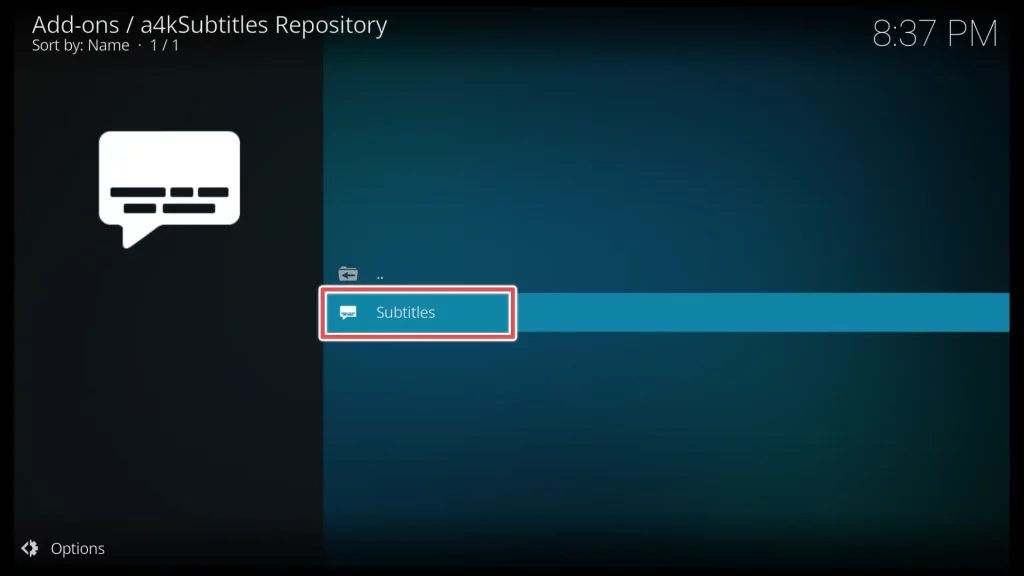
17. Install the a4kSubtitles addon.
18. In a few seconds, you will receive a notification confirming that the addon has been successfully installed.
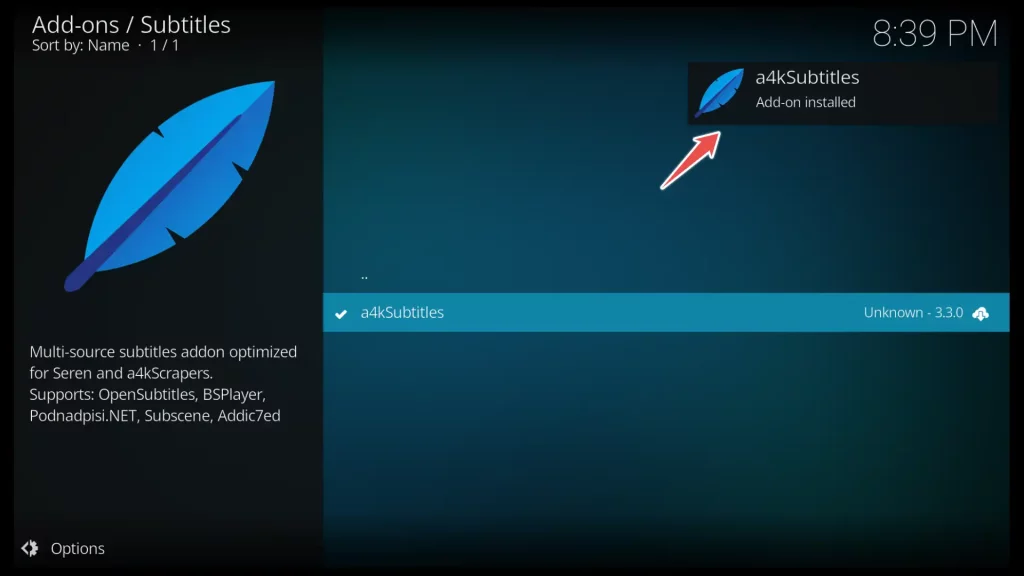
Congratulations, you’ve completed the installation of the addons. Next up is playing your favorite movie or TV show with subtitles using the addons we’ve installed.
How to Use Subtitles Add-ons on Kodi?
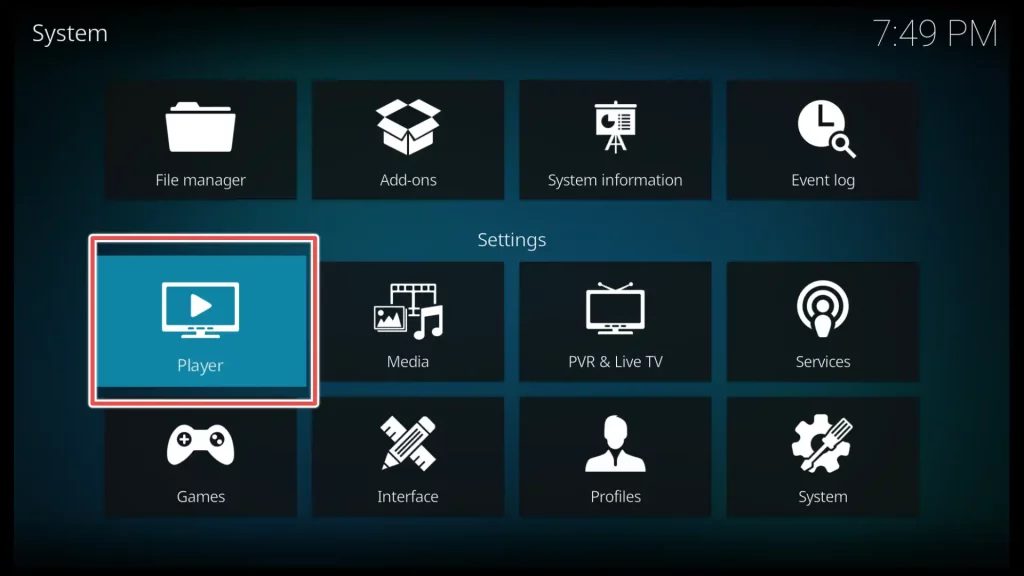
Before we can start using the subtitle addons that we have installed, there are a few steps we need to take.
Return to the settings menu and select the Player section.
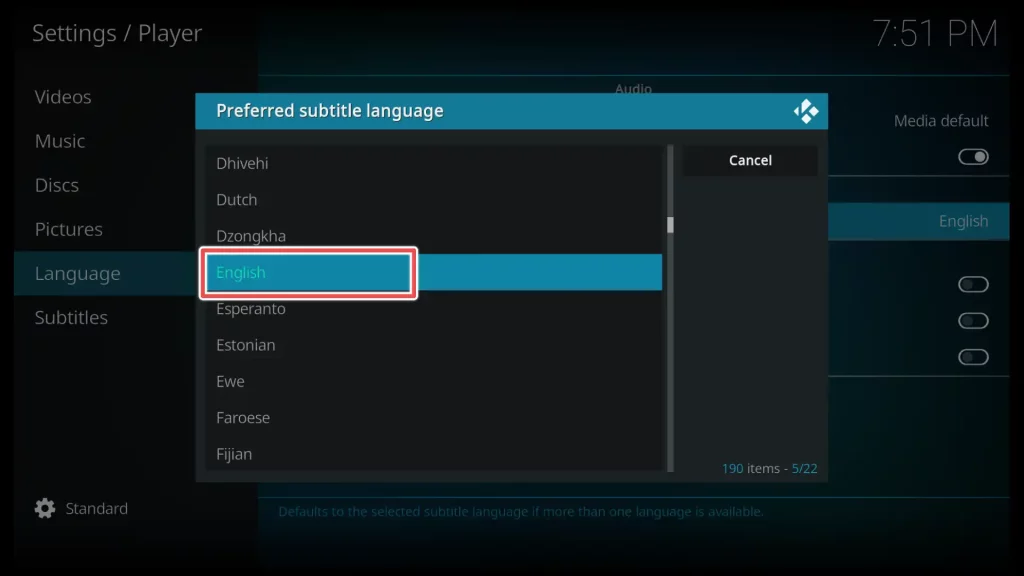
Here, in the Language tab, you can select your preferred subtitle language.
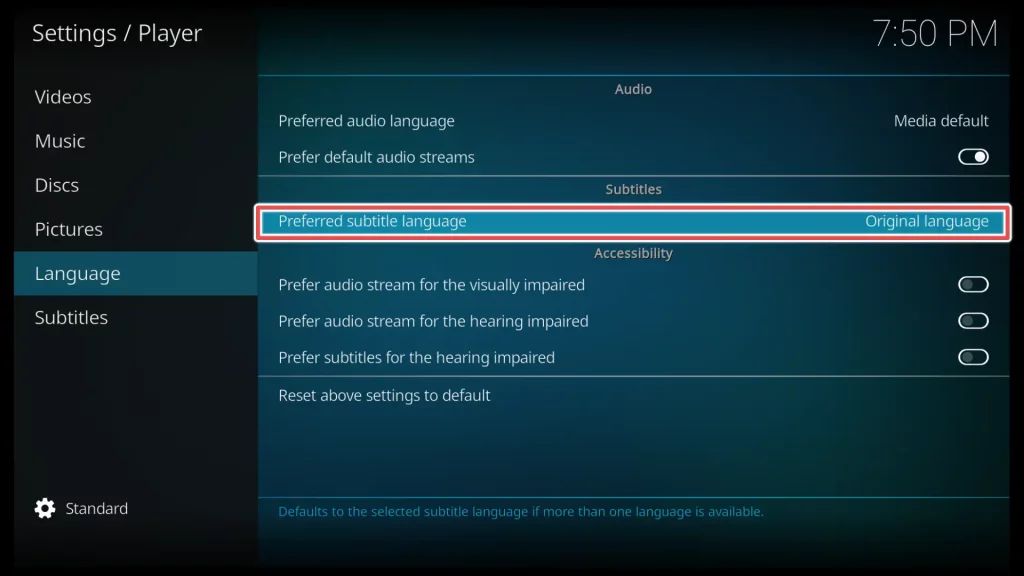
To choose your subtitle language in Kodi, double-click on the desired language.
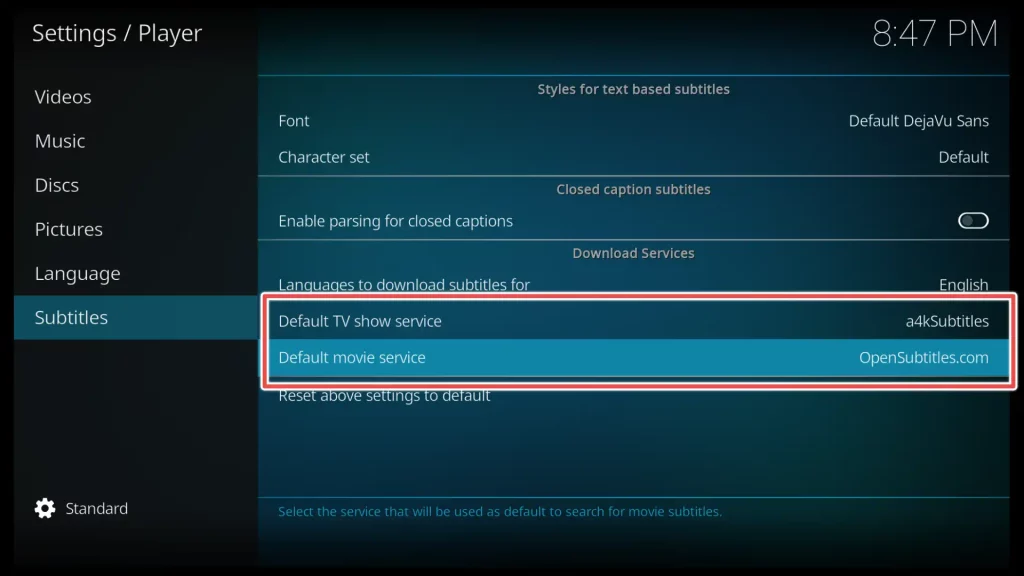
In the Language to download subtitles for option, you can set multiple languages.
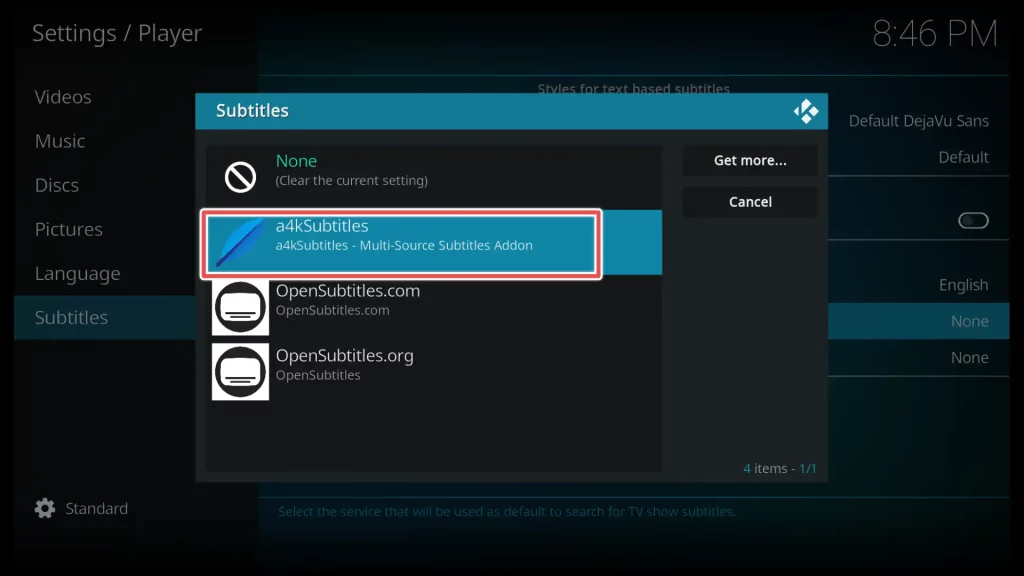
To set your preferred subtitle add-on as the default for TV shows or movies, click on Default TV show or Default movie service.

Choose one of the installed add-ons.
That’s it! We have finished setting up the subtitle preferences.
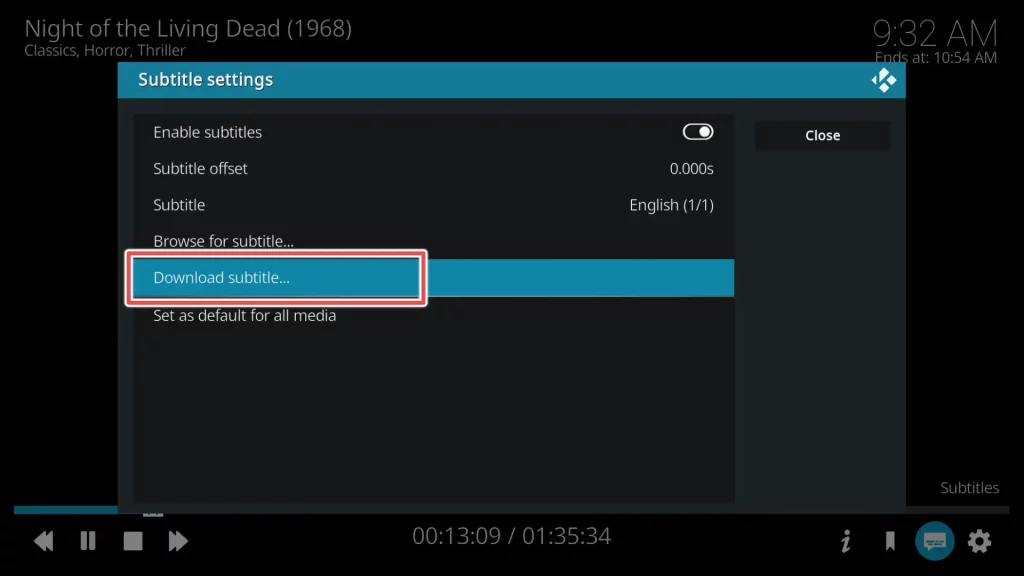
Now, let’s play a movie to see if the subtitle add-ons we installed are working. Navigate to the subtitle icon, represented by a speech bubble, and click on it.

Choose Download subtitle… .
As you can see, the a4kSubtitles addon has successfully downloaded subtitles from three different services: OpenSubtitles, Subscene, and Podnapisi.
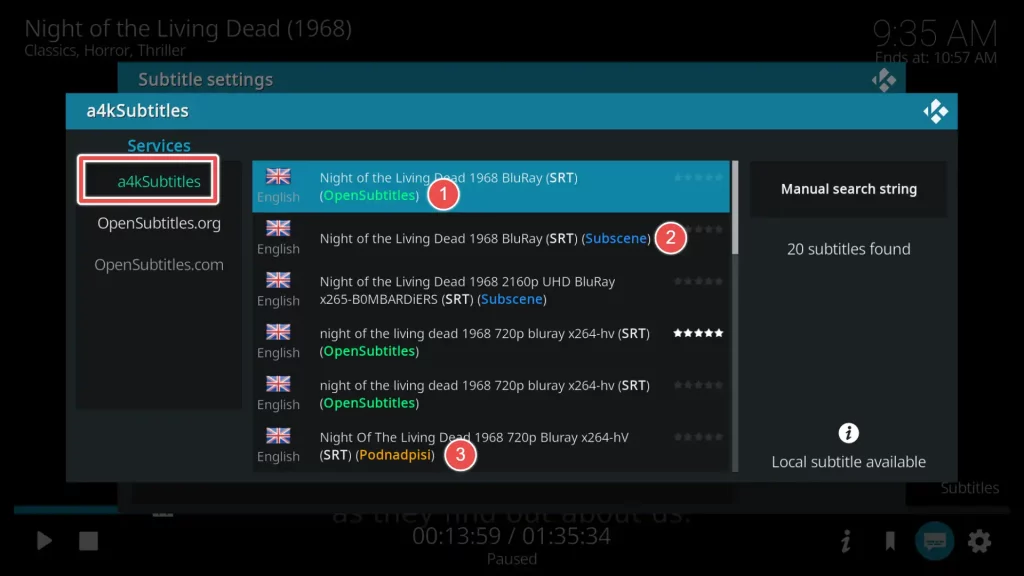
You can click on any of the installed addons, wait a few seconds for the subtitles to be downloaded, and then select your preferred subtitle file.
Your subtitles have been successfully loaded. Enjoy the movie!

In the End
It’s important to keep in mind that subtitles, most of the time, are synced with the movie. However, If one subtitle file isn’t accurate or properly synced, you can easily switch to another subtitle file from the available choices.
Additionally, Kodi provides a subtitle offset function that allows you to manually adjust the timing of the subtitles if they are not in sync with the audio or video.
In the end, by installing just one add-on from this guide, you can easily enjoy your favorite movies with subtitles.