About Syncler
Syncler is an app that approaches how you view movies and TV shows differently than other apps.
Unlike other apps, it doesn’t have built-in links or scrapers for streaming content. Instead, you must add your third-party provider packages to access the content you want to watch.
Currently, the only free provider package available on Syncler is Kosmos. However, I will walk you through installing Kosmos and connecting it with your Real-Debrid account, which is essential if you want to use Syncler to its full potential.
Attention FireStick Users!
Constant surveillance by governments and internet service providers (ISP) is a reality when you’re online. Streaming content online using your personal IP address: 68.65.122.36 can lead to trouble.
I highly recommend using ExpressVPN to hide your IP address while streaming on your FireStick.
It’s not only blazing fast but also incredibly secure. Installing it on your device is a breeze and the best part? You get a 30-day money-back guarantee, no questions asked. Plus, ExpressVPN is currently running an amazing deal where you get 3 extra months free with their yearly plan!
Stay safe, stay secure, and enjoy your streaming without worries. Get ExpressVPN today!
Read: How to Install and Use ExpressVPN on FireStick(Step by Step Guide)
Syncler+
To take your streaming experience to the next level, you should check out Syncler+.
This app’s premium version offers fantastic features, including an ad-free experience and access to the Express package that provides more high-quality links.
You’ll also get access to a suite of debrid utility tools like Debrid Manager, Debrid Cloud Source, and Magnet Picker to easily manage and access a wide range of content directly within the app.
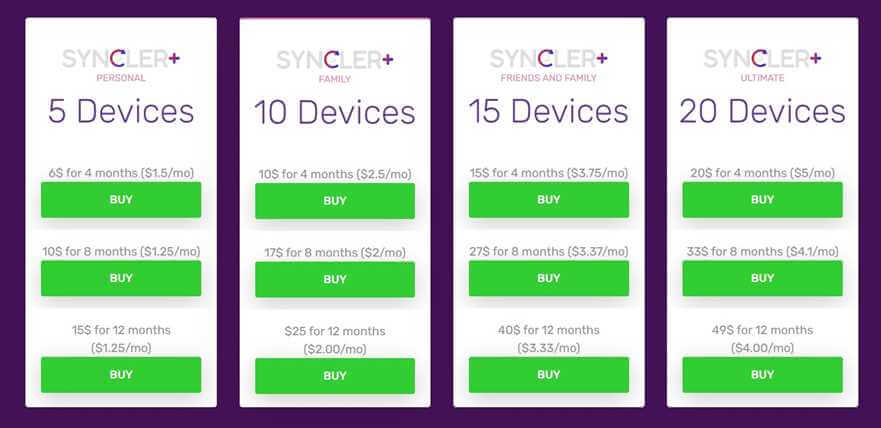
These are the different plans available for Syncler on their website:
How to Install Syncler on FireStick with Kosmos Package
Syncler is unavailable for download on the Amazon Store, so you must prepare your FireStick to download third-party apps like Syncler.
To do this, you should enable your FireStick to install unknown applications, then install Downloader, which is needed to install the Syncler installer. Finally, you can use the Syncler installer to install the Syncler app on your FireStick.
Enable Your Firestick to Install Third-Party Applications
1. Click the on settings gear icon.
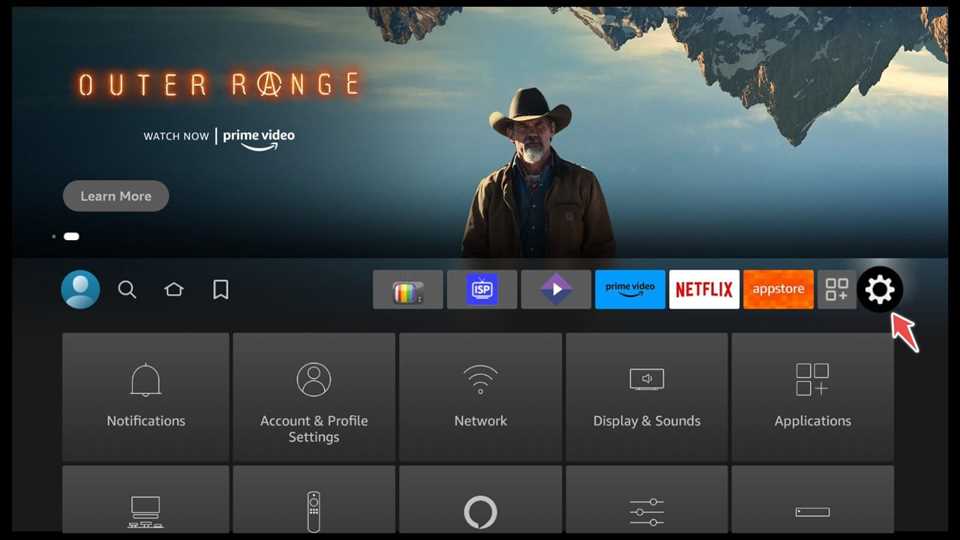
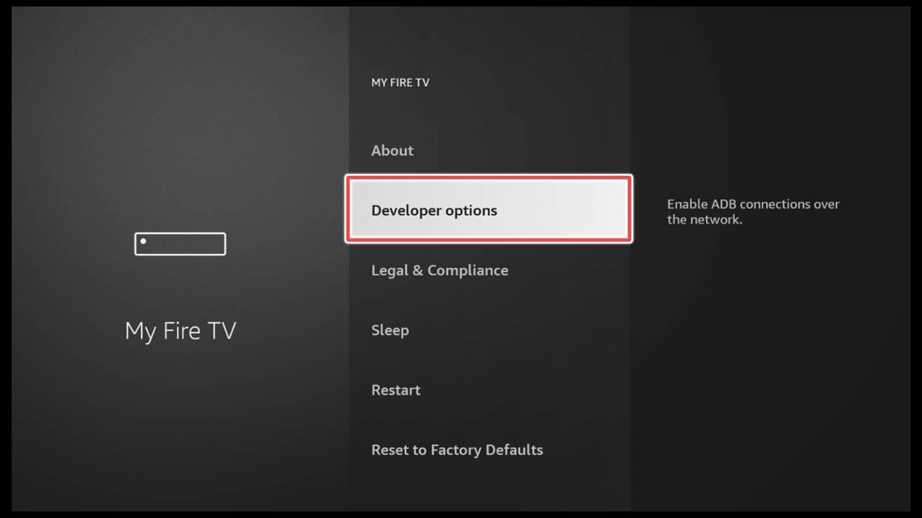
2. Choose My Fire TV.
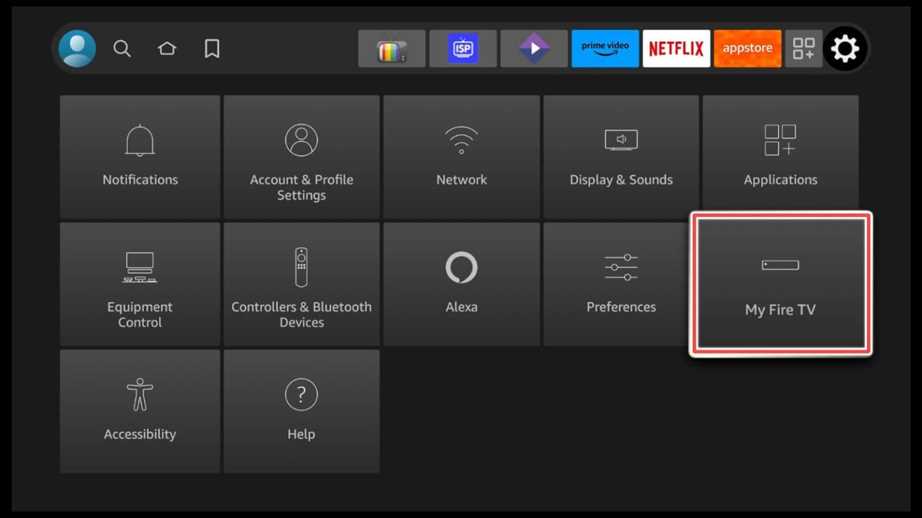
3. Open Developer options.
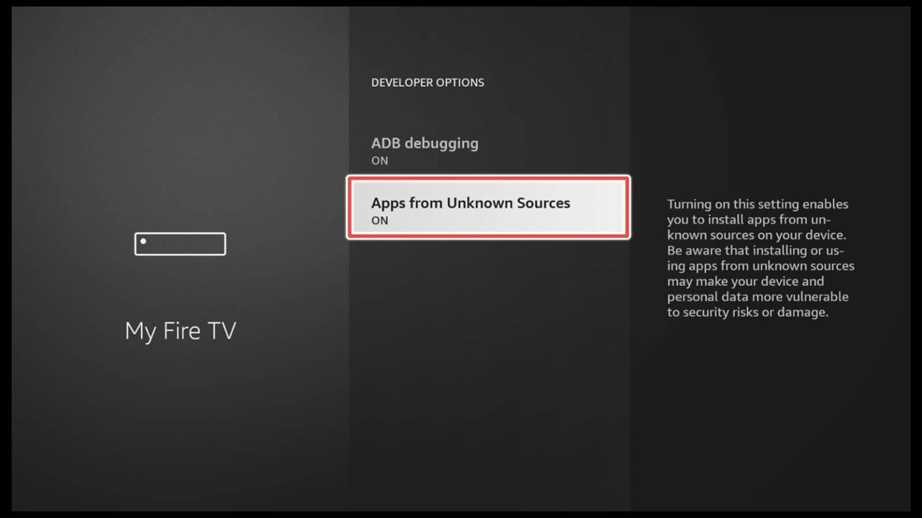
4. Enable Apps from Unknown Sources option.
Install Downloader on FireStick
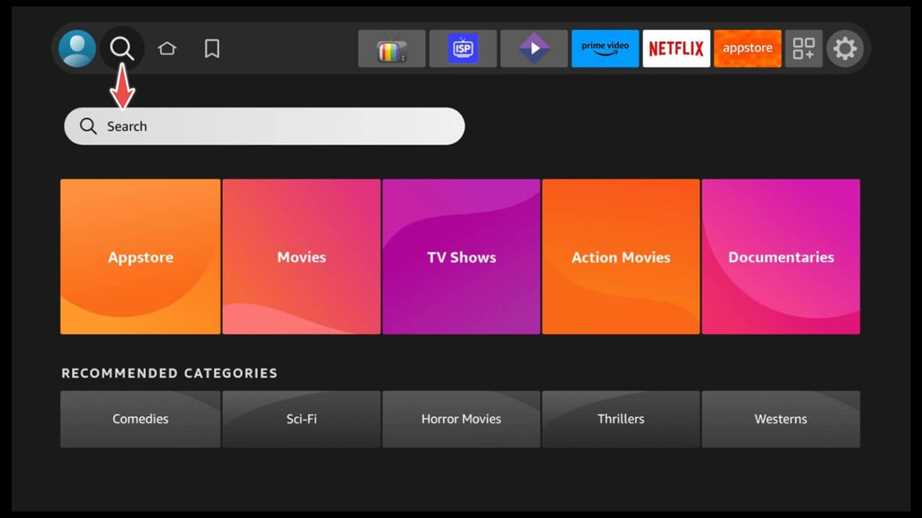
1. Go to the search bar on your FireStick’s home screen and click on it.
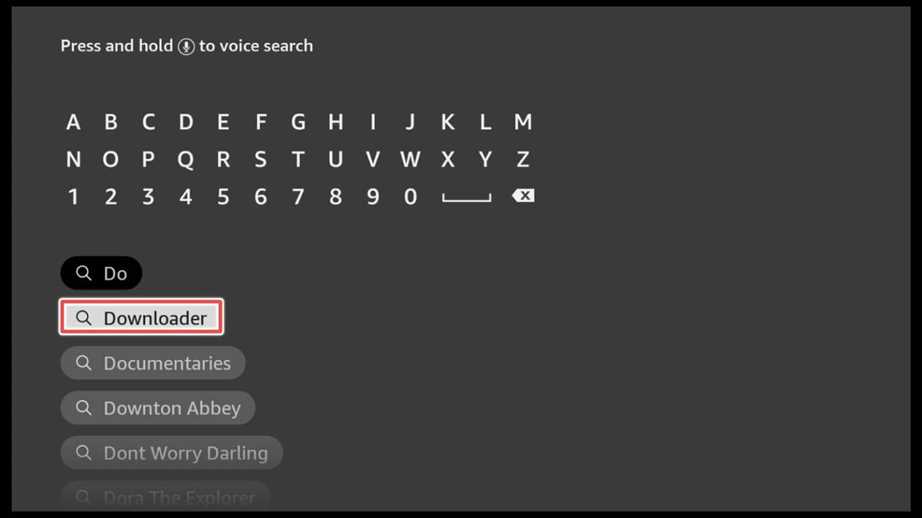
2. Type in “Downloader” and select it from the list of available search suggestions.
3. Download the Downloader app.
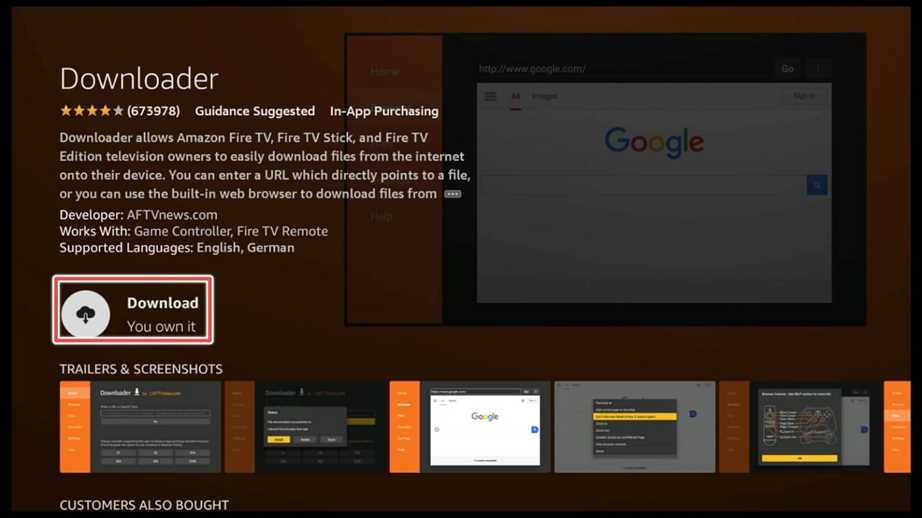
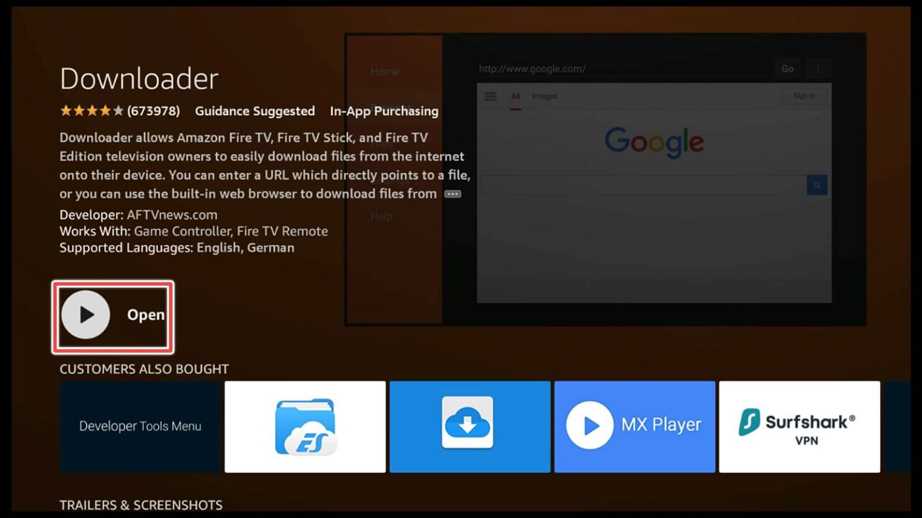
4. Launch the Downloader app.
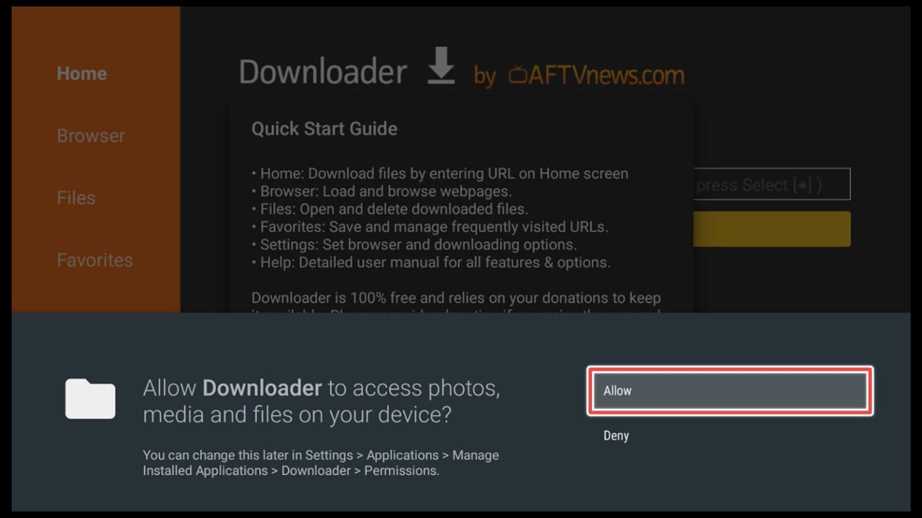
5. Click Allow to give the Downloader app permission to access your device’s photos, media, and files.
Download and Install the Syncler Installer
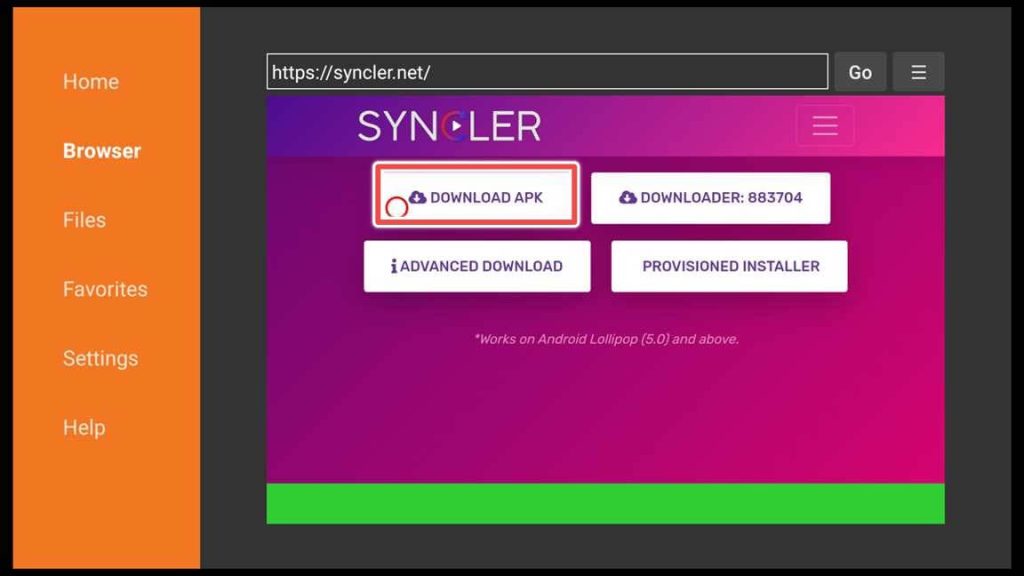
1. To download the Syncler installer, use the URL: syncler.net.
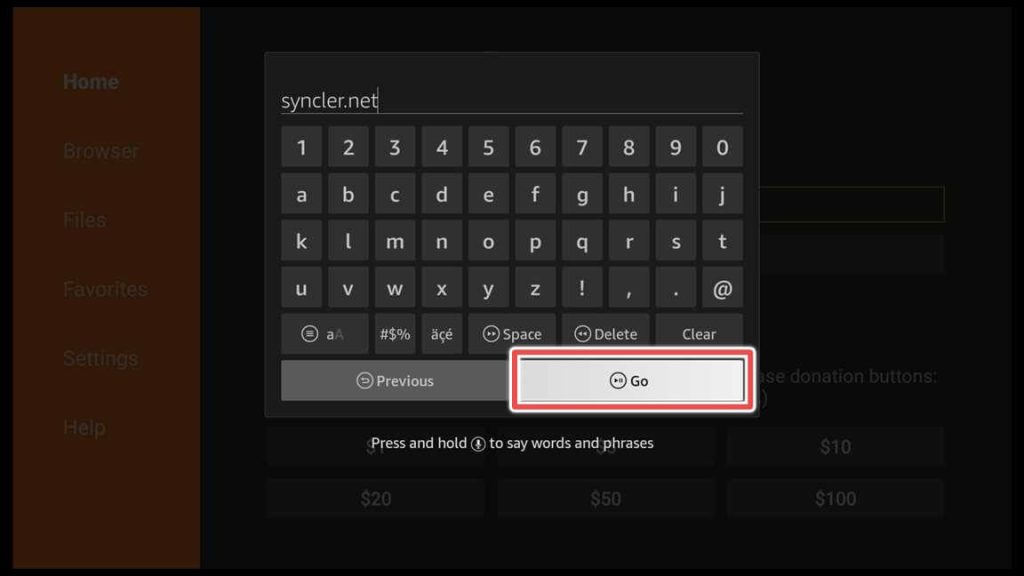
2. Please scroll down to the Download Apk button and click on it. Additionally, the latest downloader code for the Syncler application can be viewed on this webpage.
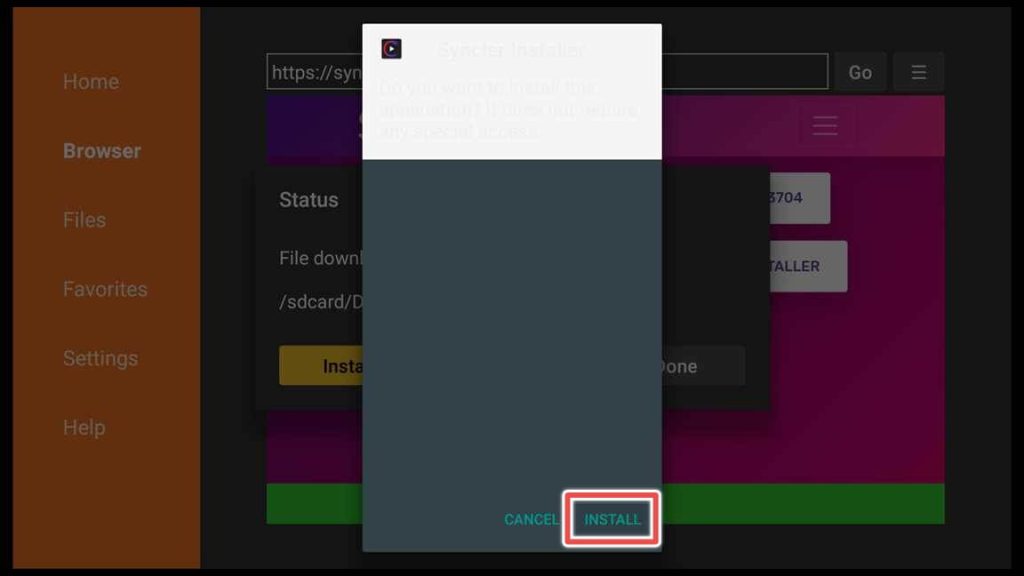
3. Select Install to initiate the installation of the Syncler installer.
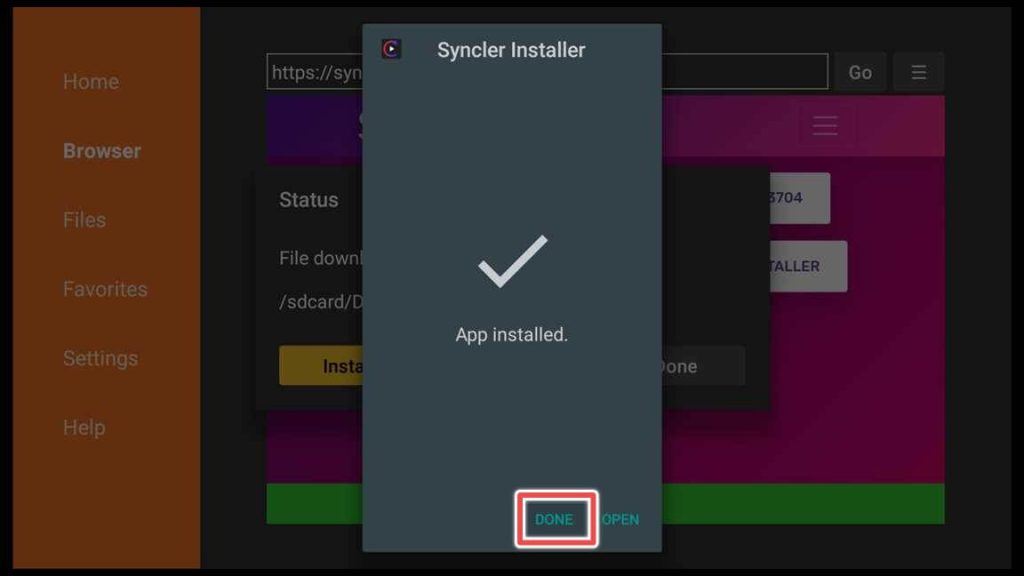
4. The installation is finished. Click Done.
5. Delete the installation file because you won’t need it anymore.
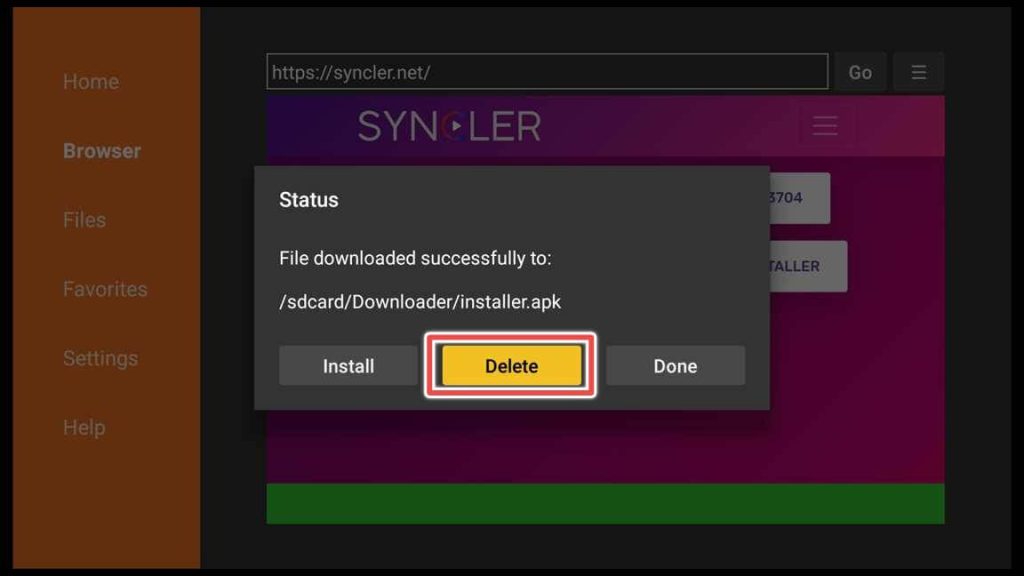
6. Now click Delete again to confirm deleting the Syncler installer installation file.
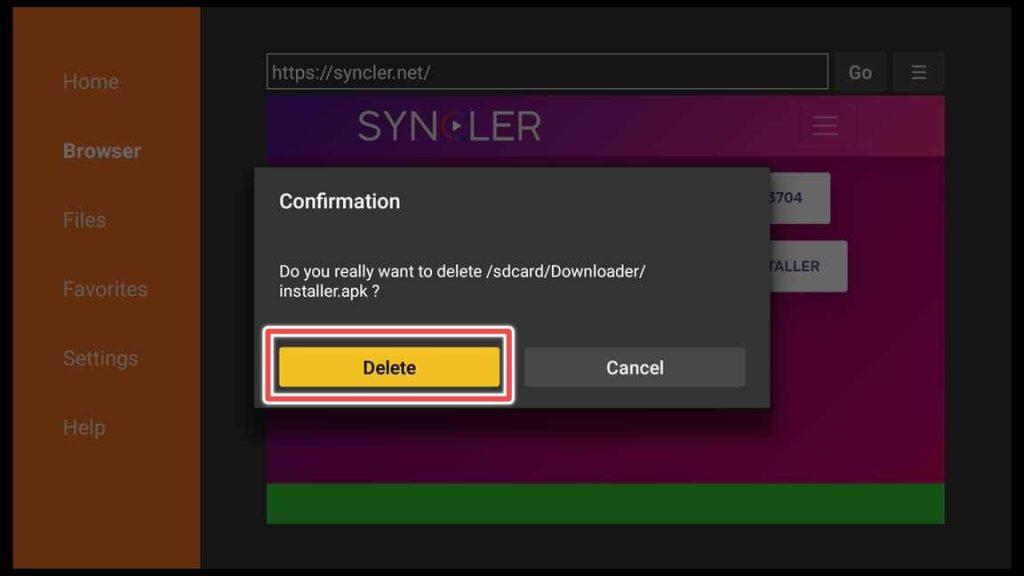
How to Download and Install Syncler on FireStick through the Syncler Installer
Great job, you’re making progress! Let’s now locate the Syncler installer app.
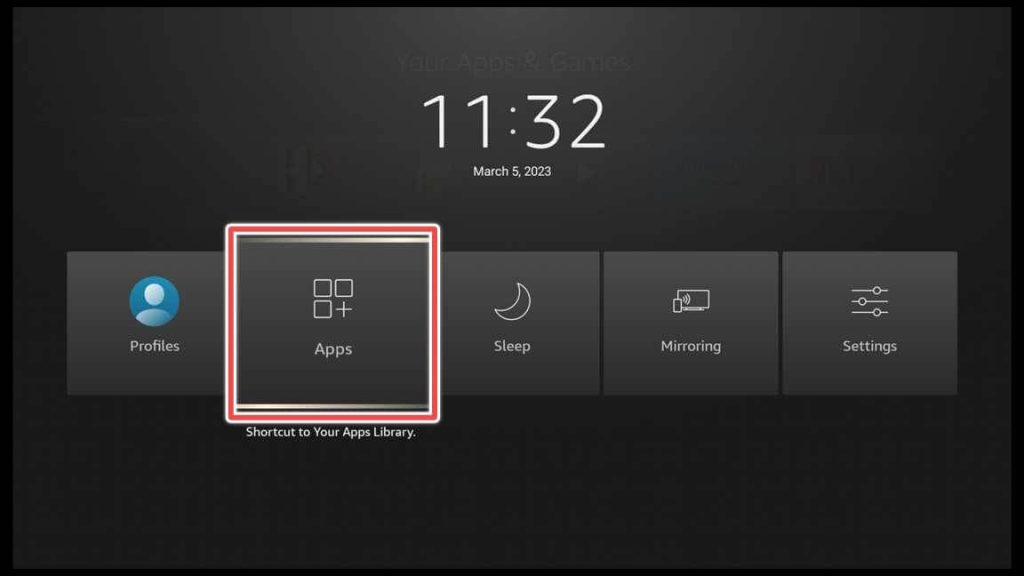
1. To access your application library, press and hold the “Home” button on your remote control until a new menu appears, then select Apps.
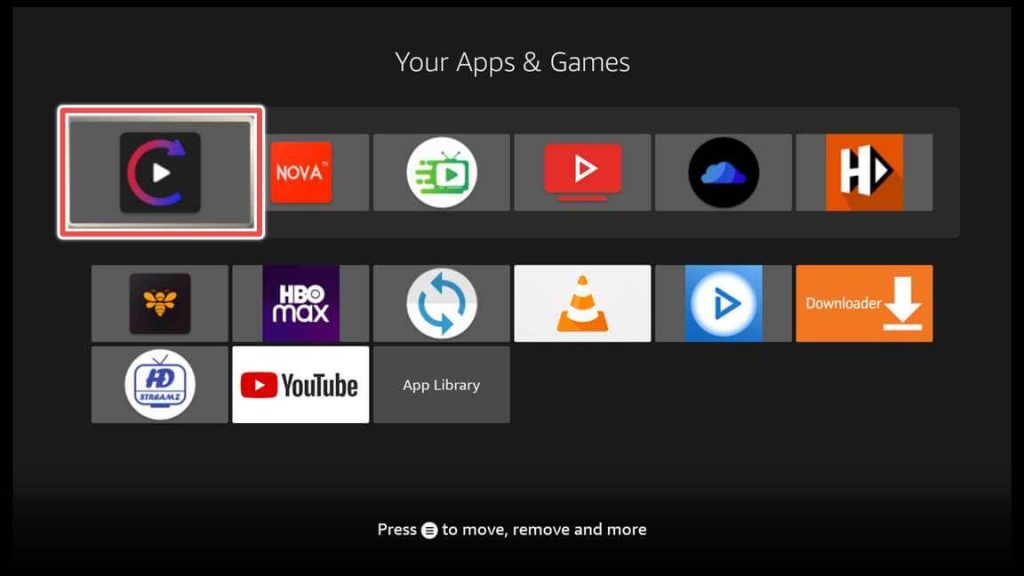
2. Click on the Syncler installer shortcut.
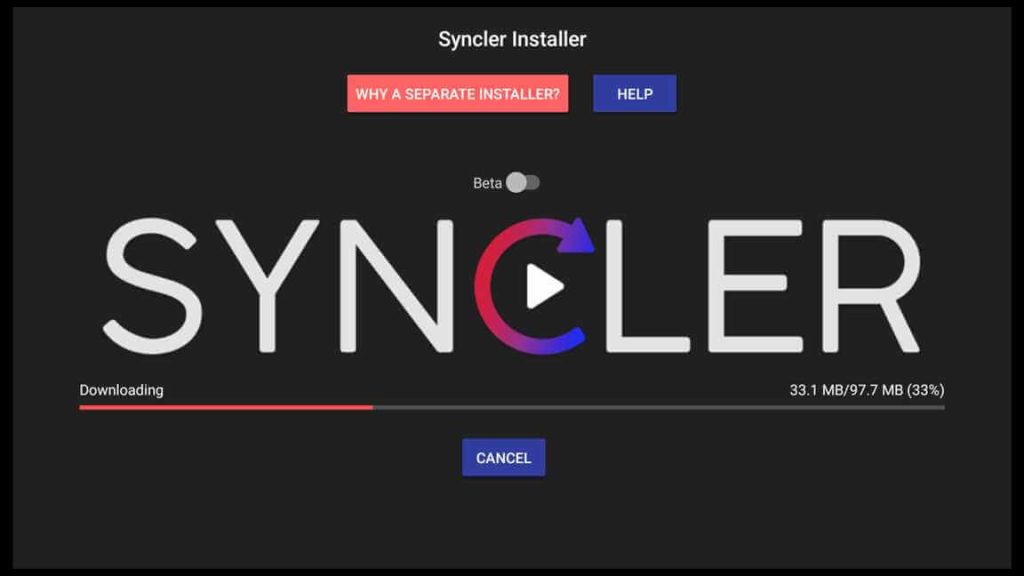
3. Now, wait for the Syncler download to complete.
4. To properly install Syncler, it is necessary to grant certain permissions to the installer during the installation process. After the installation you can revoke the permissions.
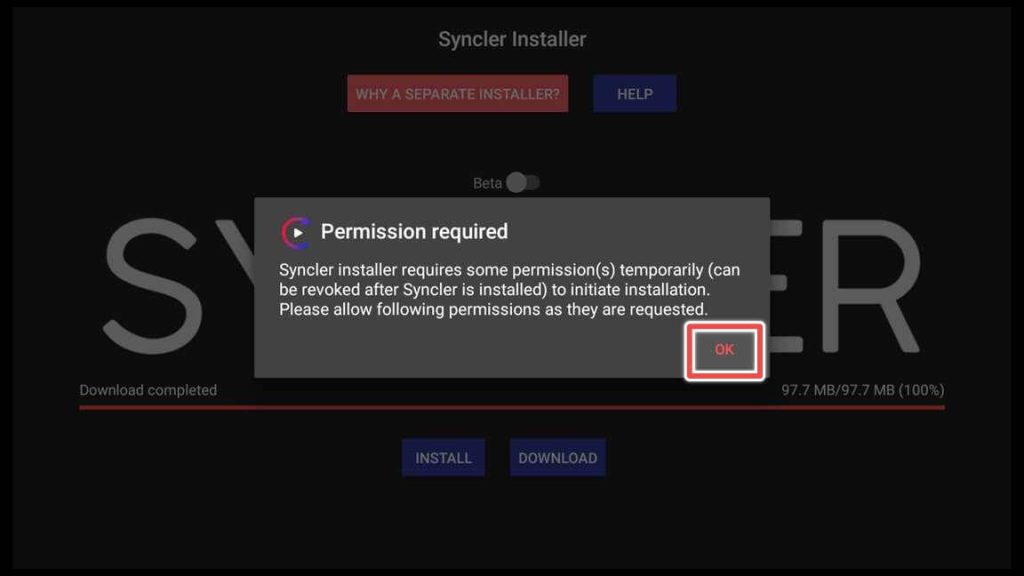
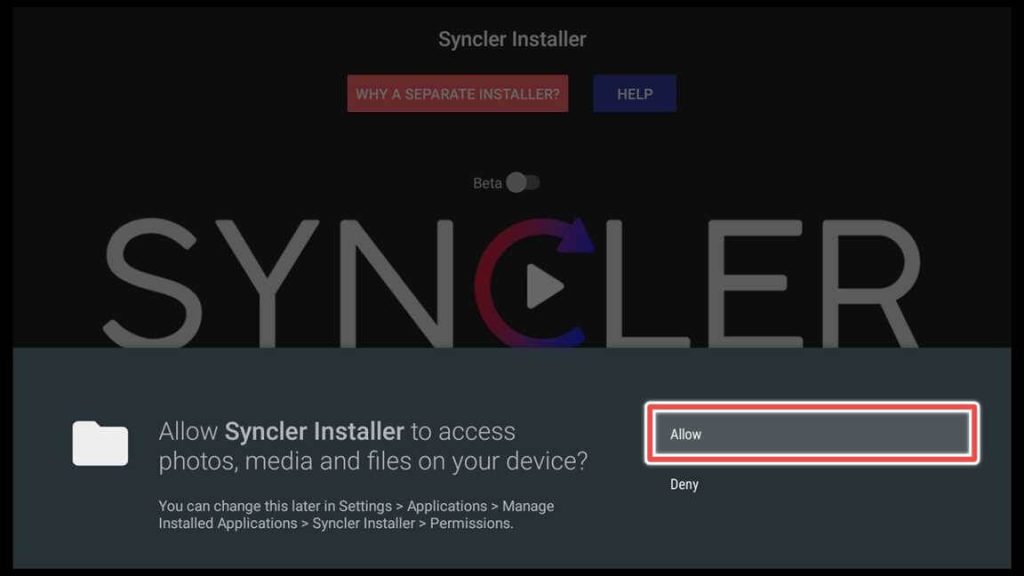
5. Now, click Allow to grant the Syncler installer access to your media files.
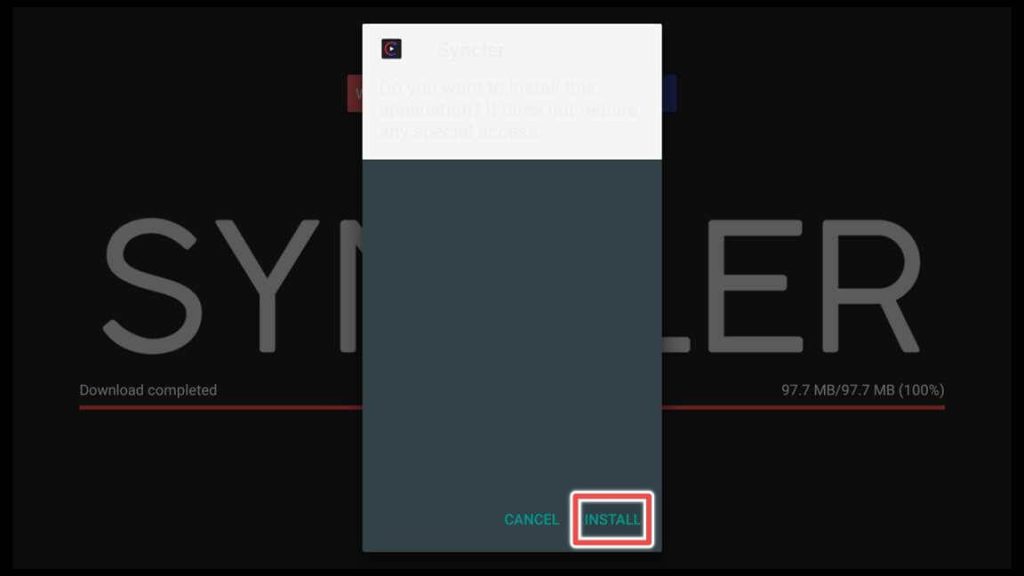
6. Select Install to initiate the Syncler application installation.
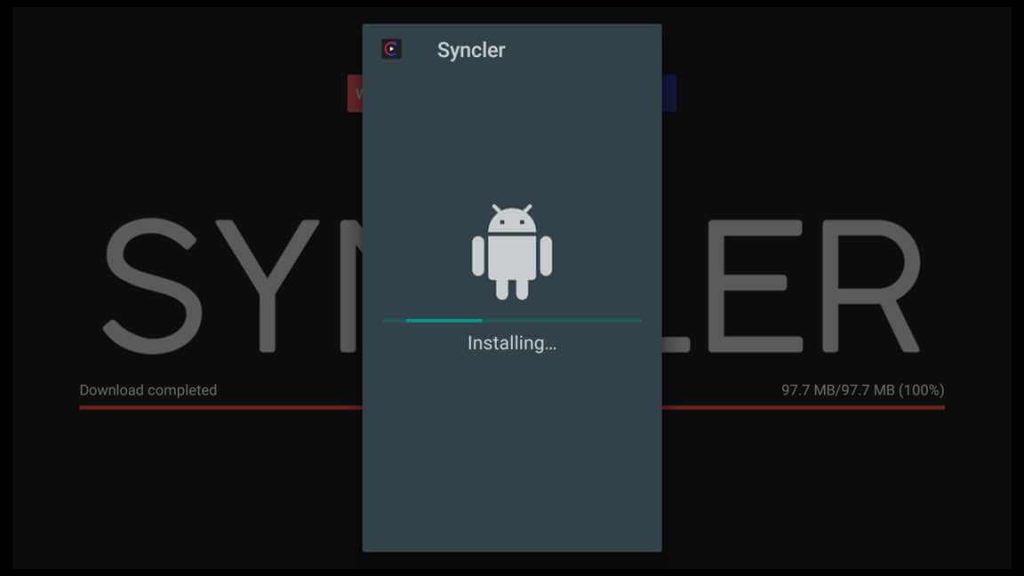
7. Please wait until the installation finishes.
8. Well done on completing the installation process. To proceed with additional app configurations, please click Open.
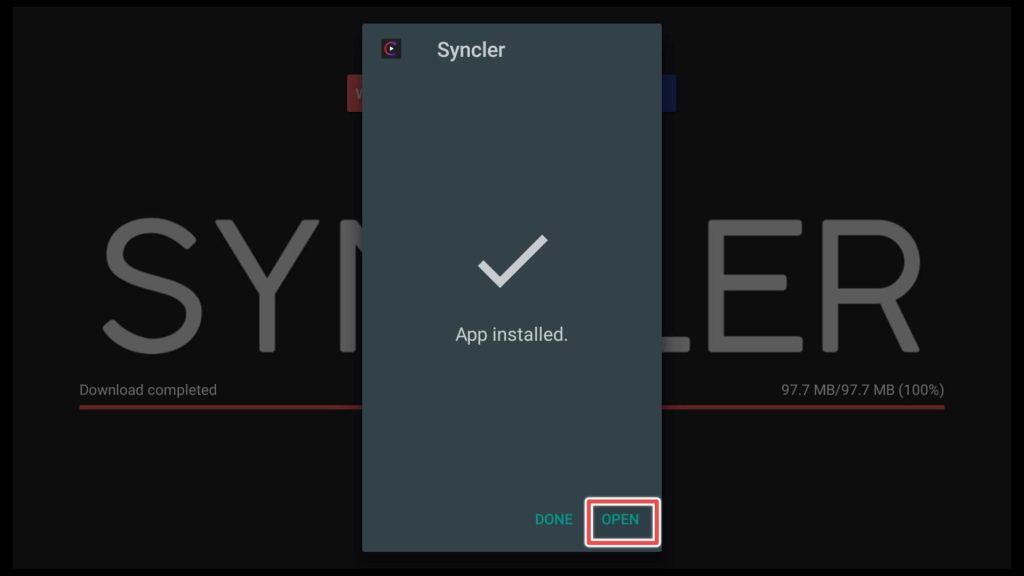
Congratulations on successfully installing Syncler on your FireStick!
How to Install Syncler Package Kosmos
Kosmos is a syncler provider package that enables media content streaming within the app, and it is compatible with the application’s free version.
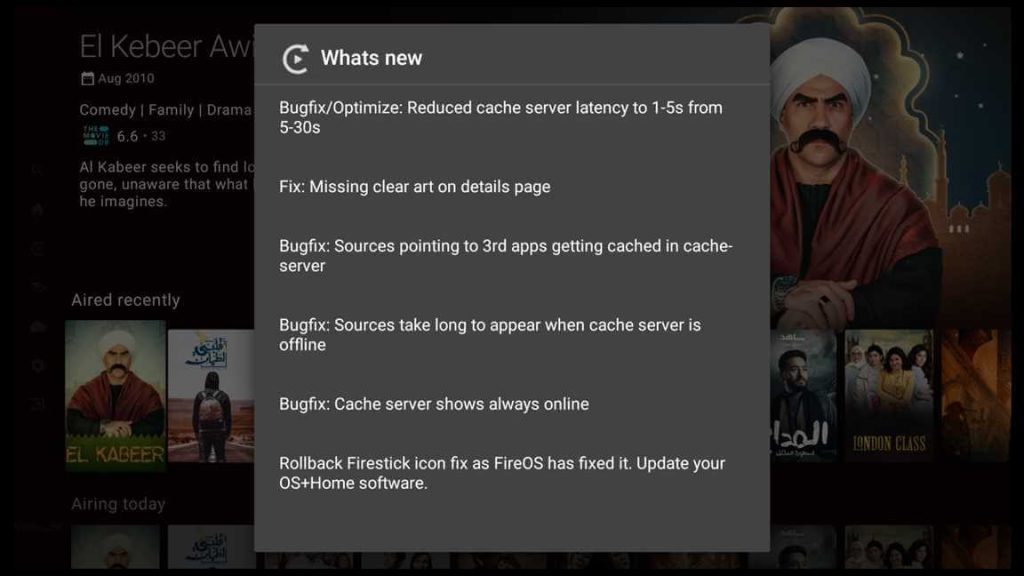
The first thing you see when you open the app is the What’s New window, where the changes from the last update are described.
1. To dismiss the window, click back on the remote control of your device.
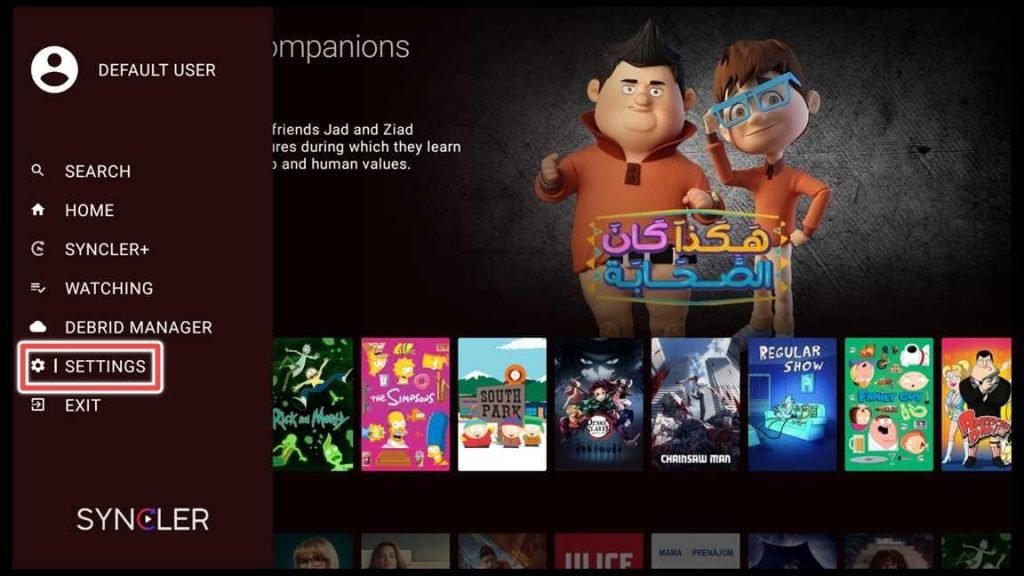
2. Now, click back on your remote control 2-3 times. When the side menu appears, choose the settings button.
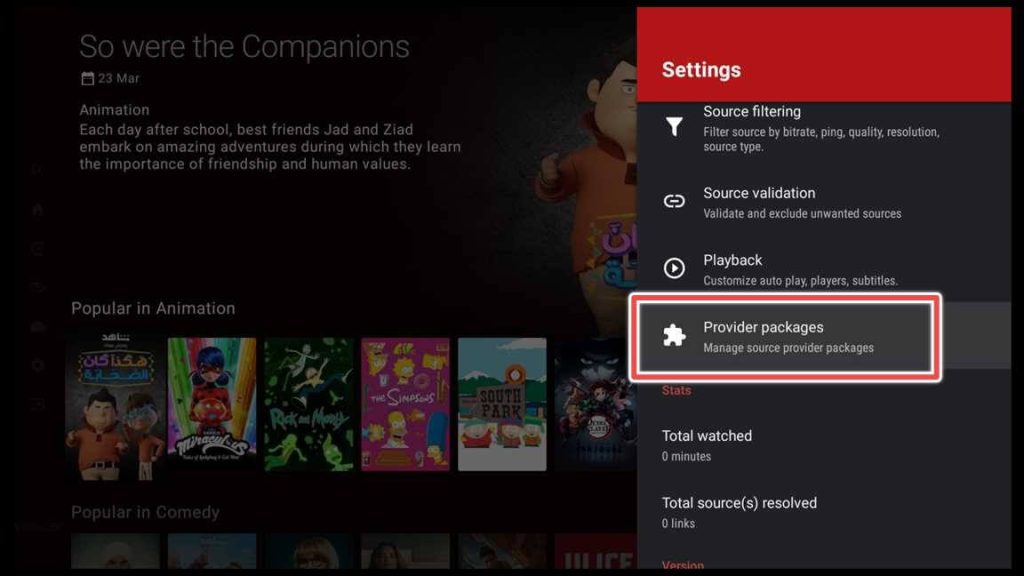
3. Click on Provider packages.
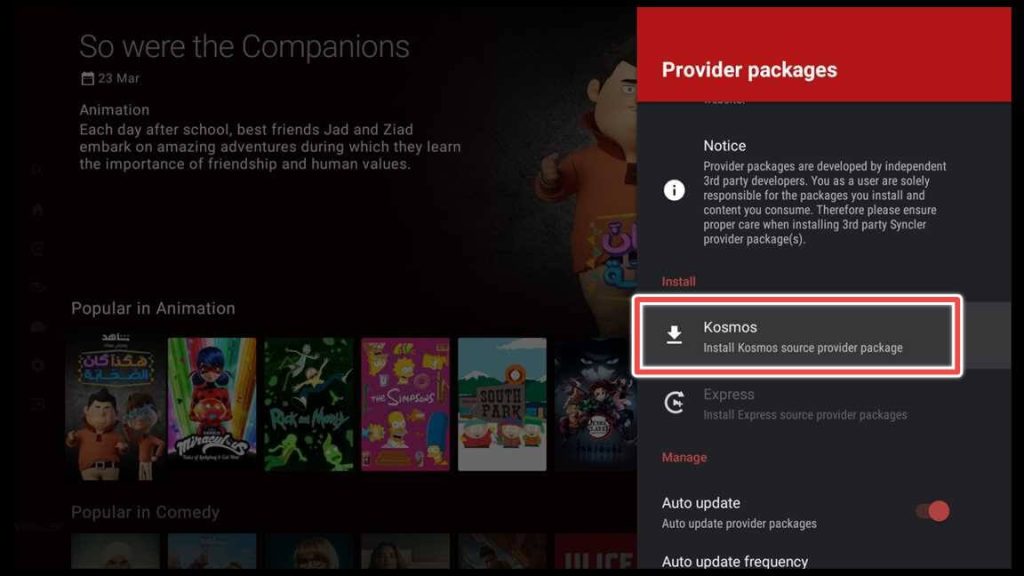
4. Choose Kosmos to install the Kosmos source provider package.
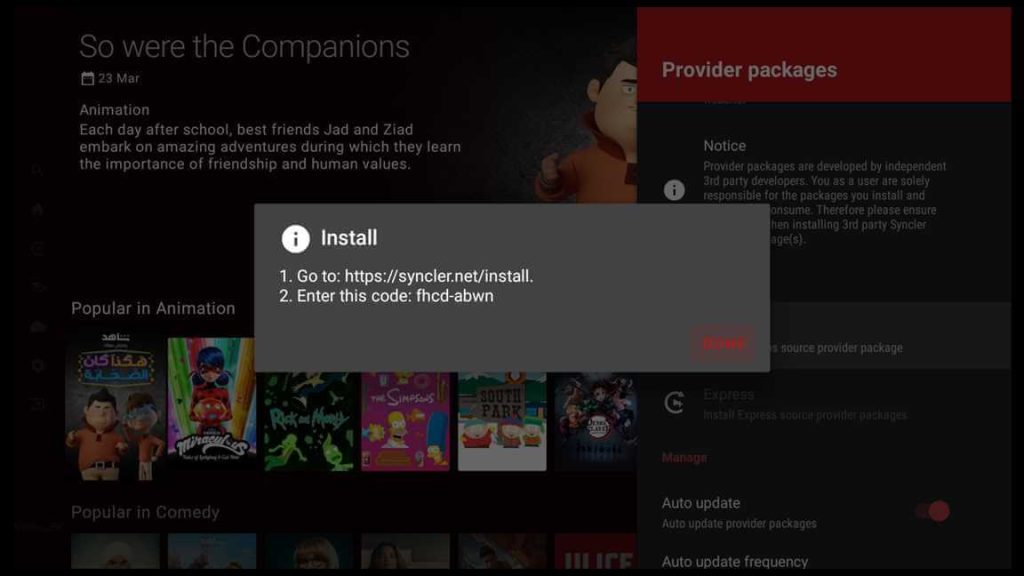
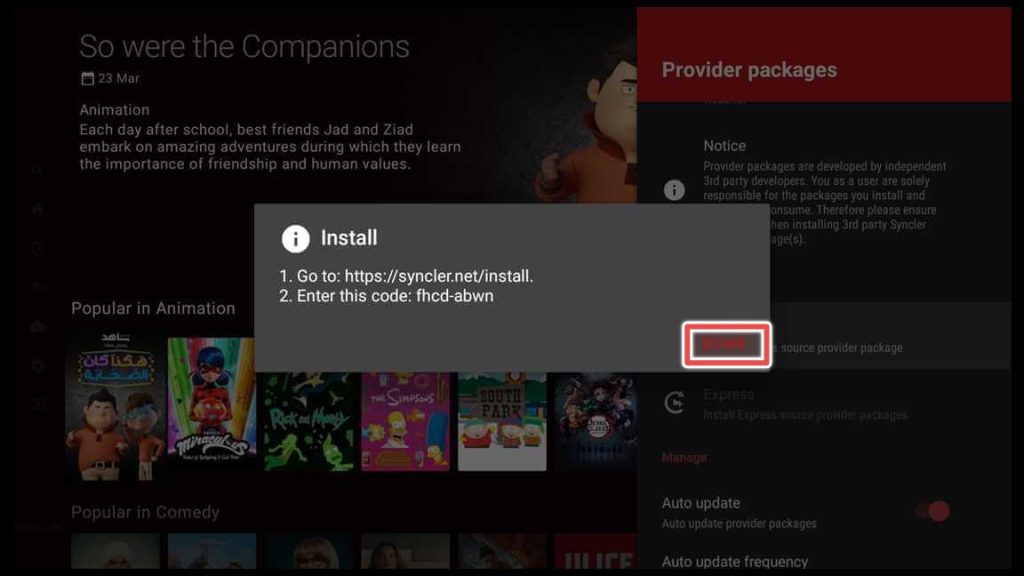
5. A pop-up window with generated code will appear. Go to https://syncler.net/install on some other device that you own.
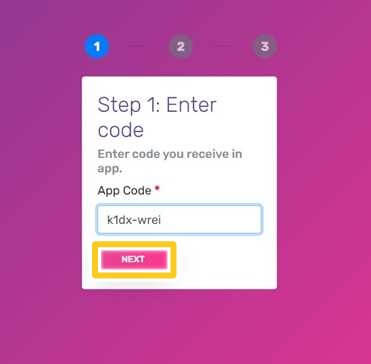
6. Input the code.
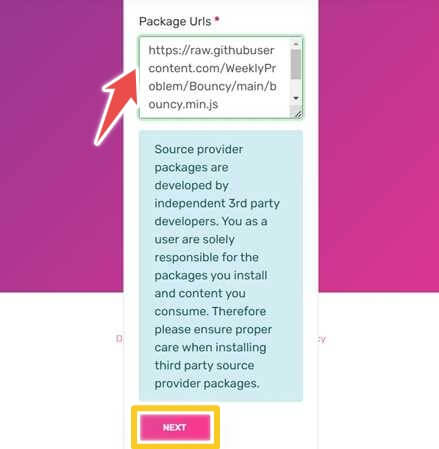
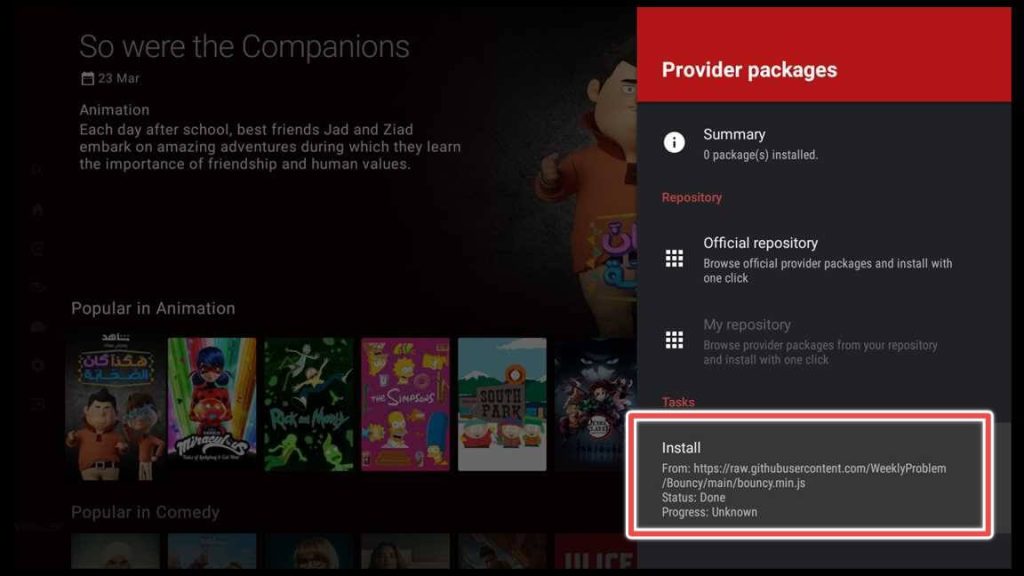
7. Enter this URL: https://raw.githubusercontent.com/WeeklyProblem/Bouncy/main/bouncy.min.js in the Package Urls input field.
Then, click Next.
8. Now, go back to the Syncler app and click Done.
9. As you can see, the Kosmos package has been successfully added to the Syncler application.
How to Connect Real-Debrid to Syncler
Using Real-Debrid with Syncler is not mandatory but highly recommended. Your experience will be smoother, and you’ll have fewer issues with buffering and lagging.
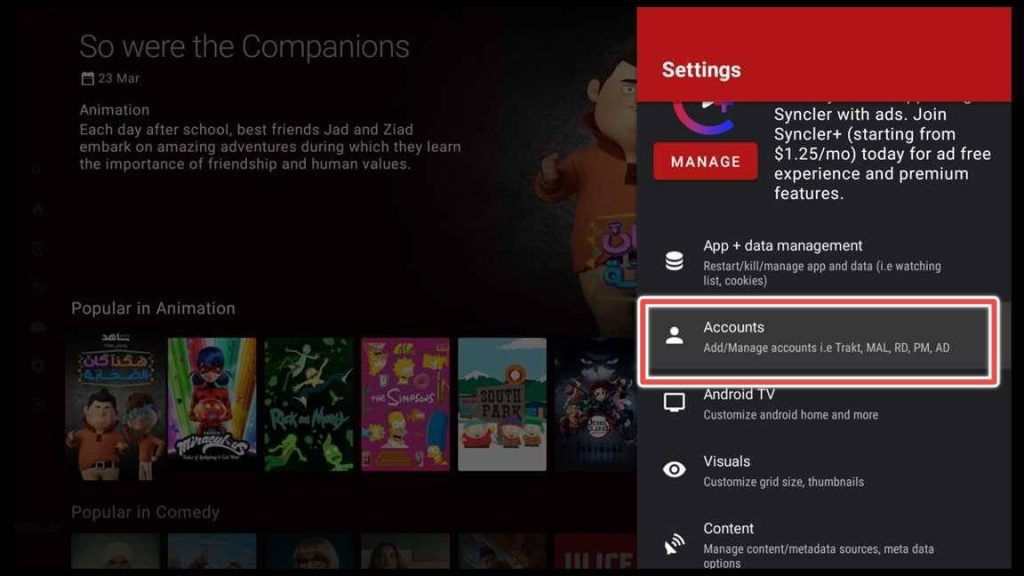
1. Go back to the settings menu of the app and choose Accounts.
2. Click on Real-Debrid.
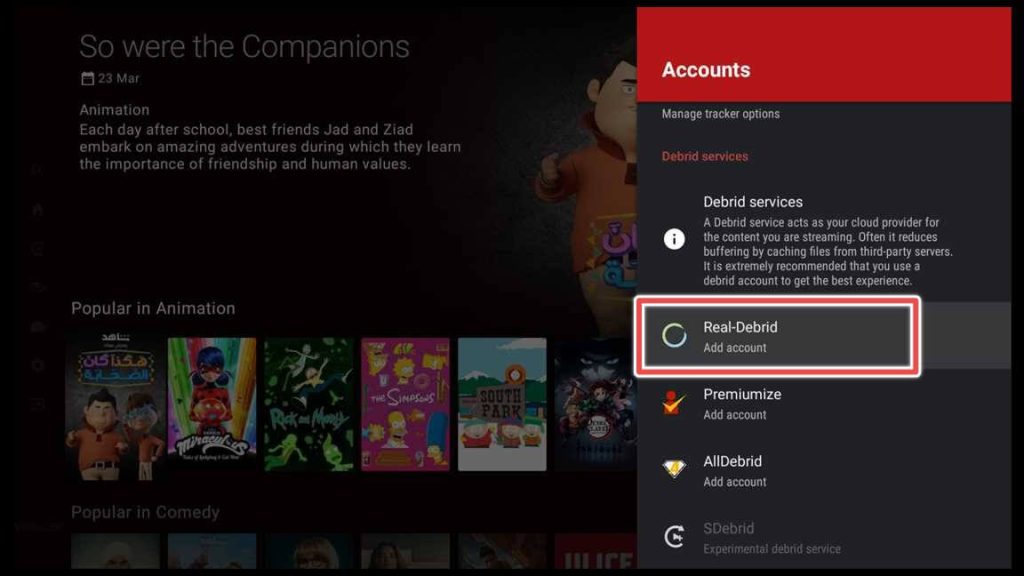
3. Select Add to add your Real-Debrid account to Syncler.
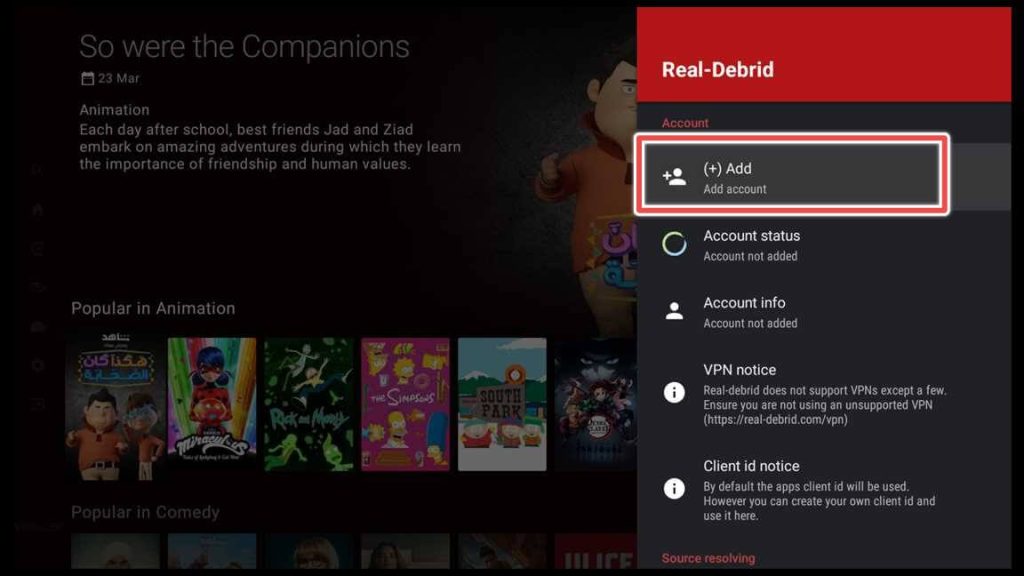
4. The pop-up window with instructions for adding your Real-Debrid account will appear. Visit: https://real-debrid/device on your phone, tablet, or computer and enter the code provided.
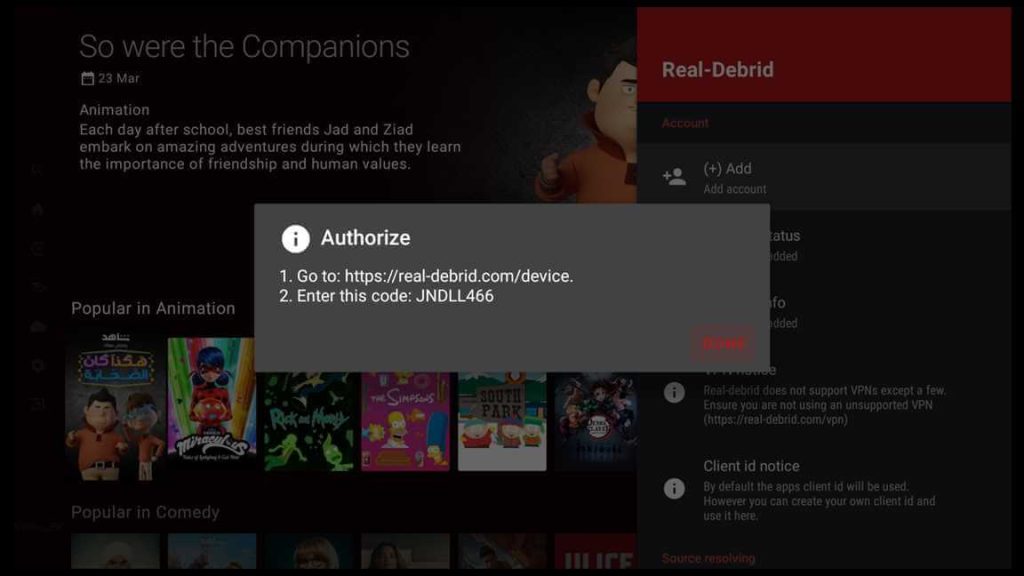
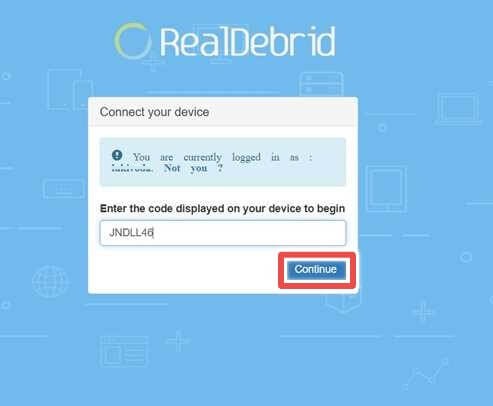
5. After you enter the authorization code, click Continue.
6. Allow Syncler permission to access your Real-Debrid account.
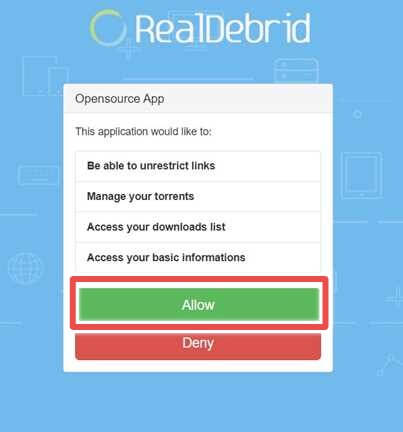
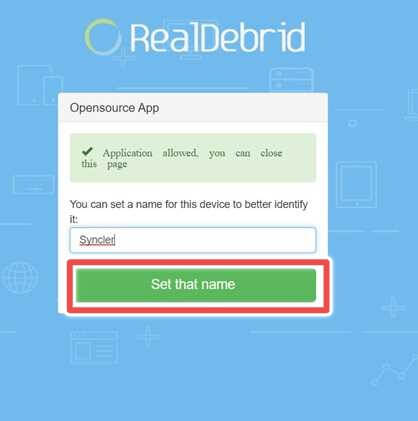
7. Your application is allowed to use Real-Debrid. Finally, set a name for the device.
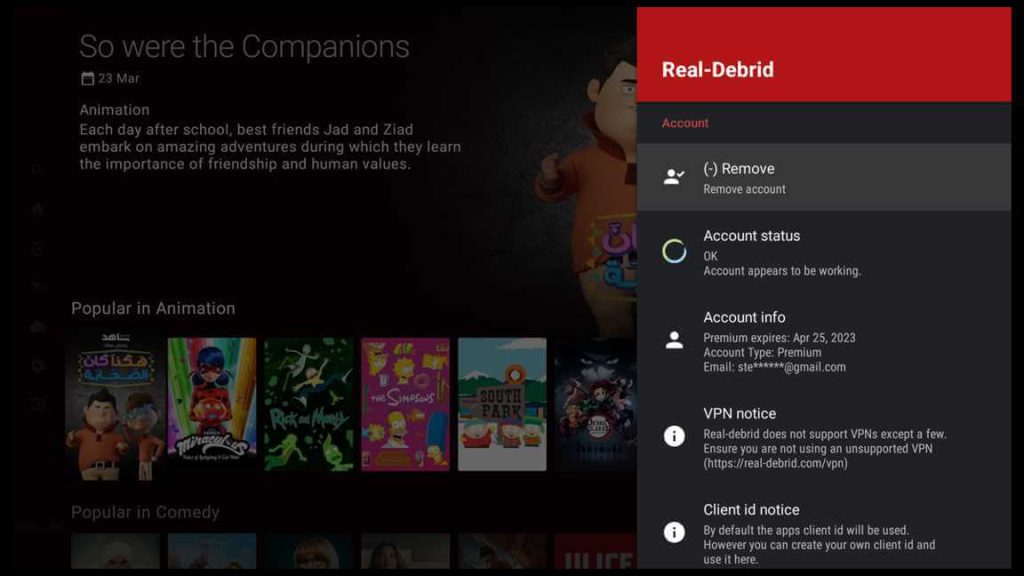
8. When you return to the Syncler app, you’ll see that the Real-Debrid account is active and working.
How to Play a Movie in Syncler on FireStick
Let’s make sure everything is working properly now.
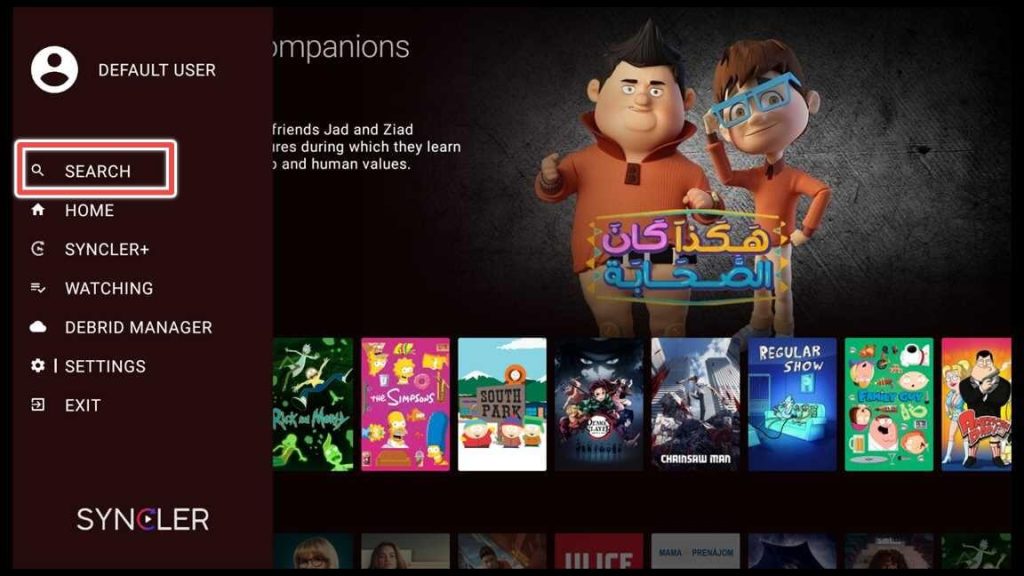
From the side menu bar, click on the Search button.
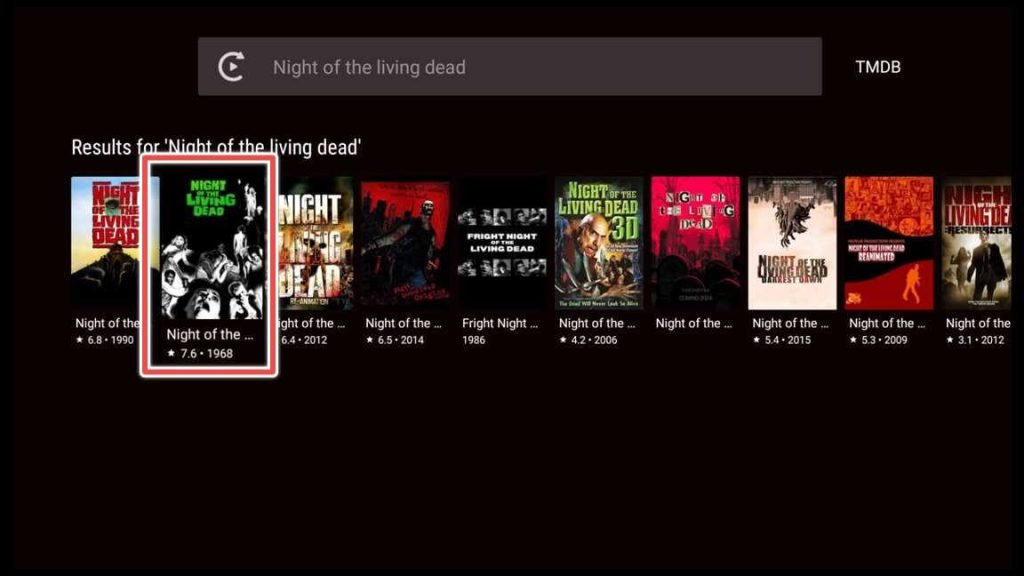
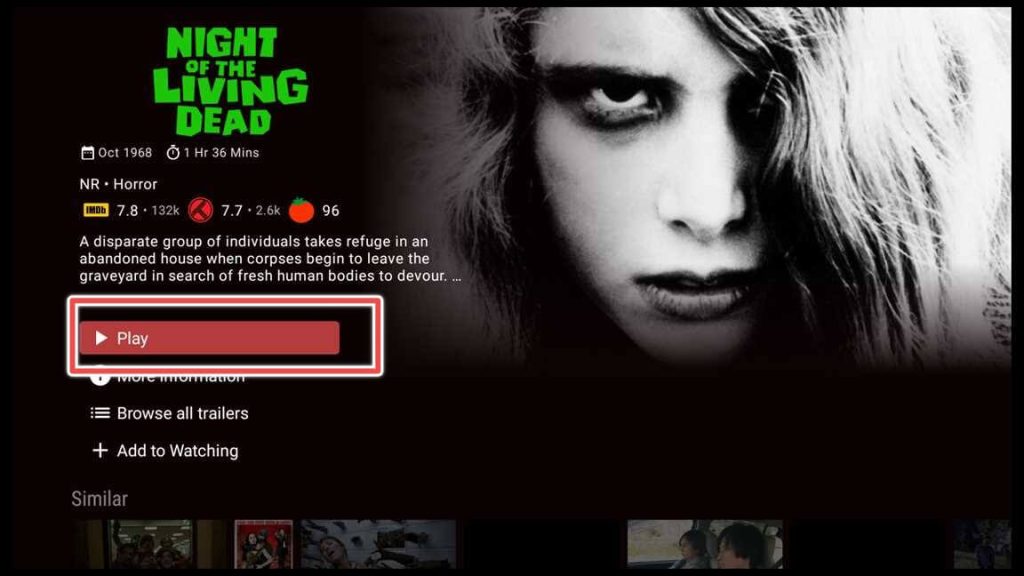
For the purpose of this tutorial and for your own safety, I’ll search for a public-domain movie.
After you find your movie in the search results, click on it.
Choose Play to play the movie.
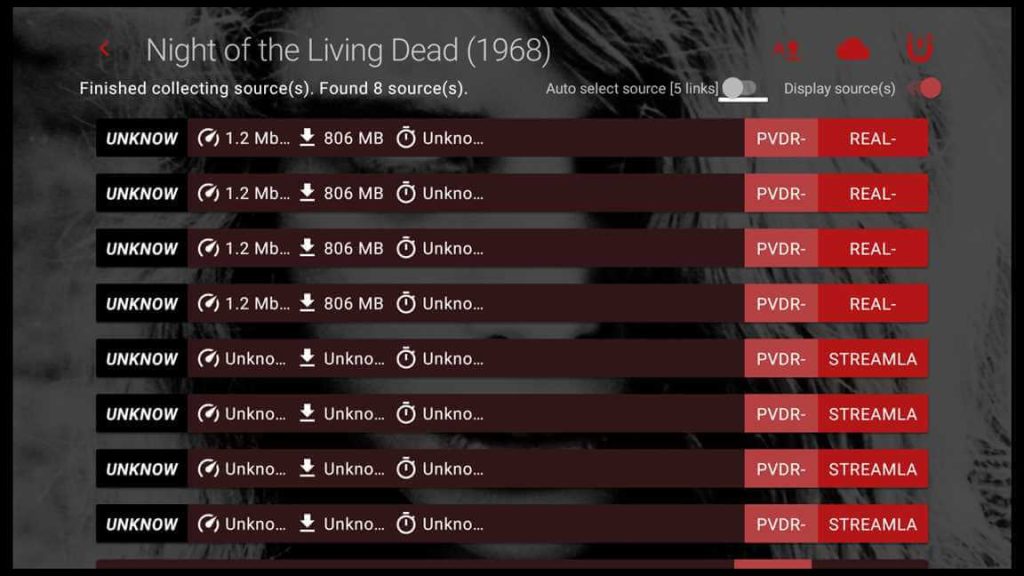
You can choose from different sources available for this movie. Just click on one of them.
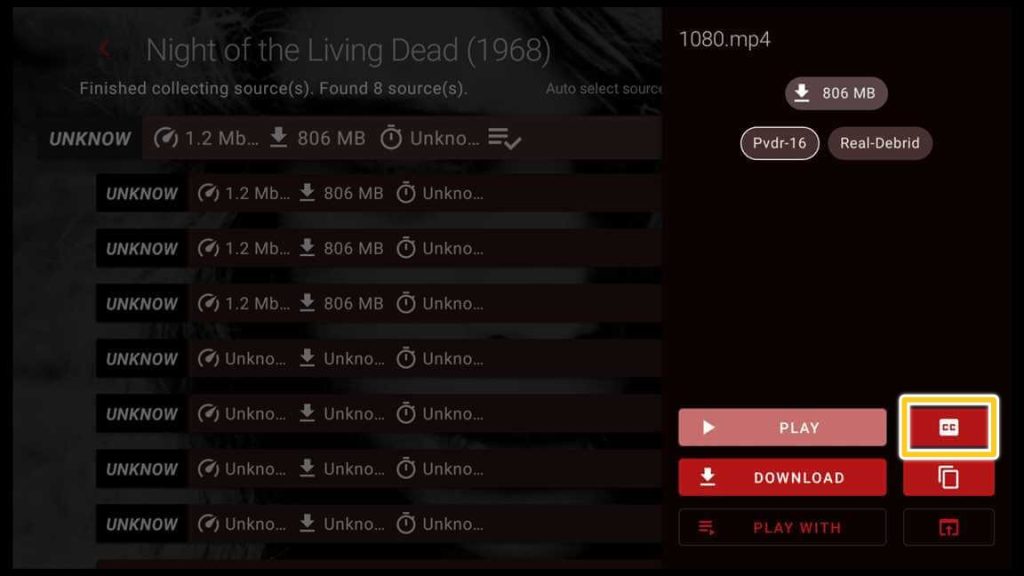
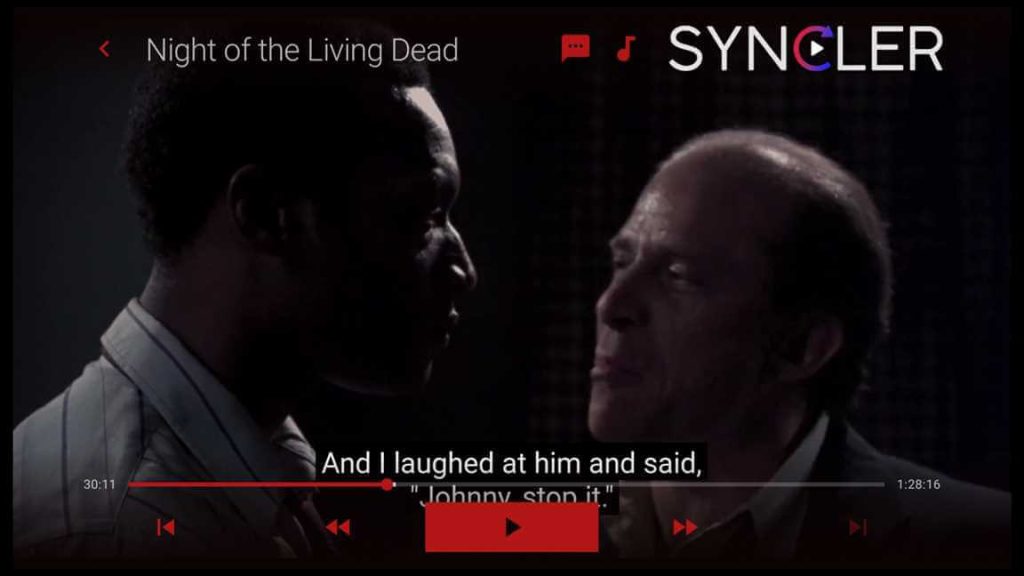
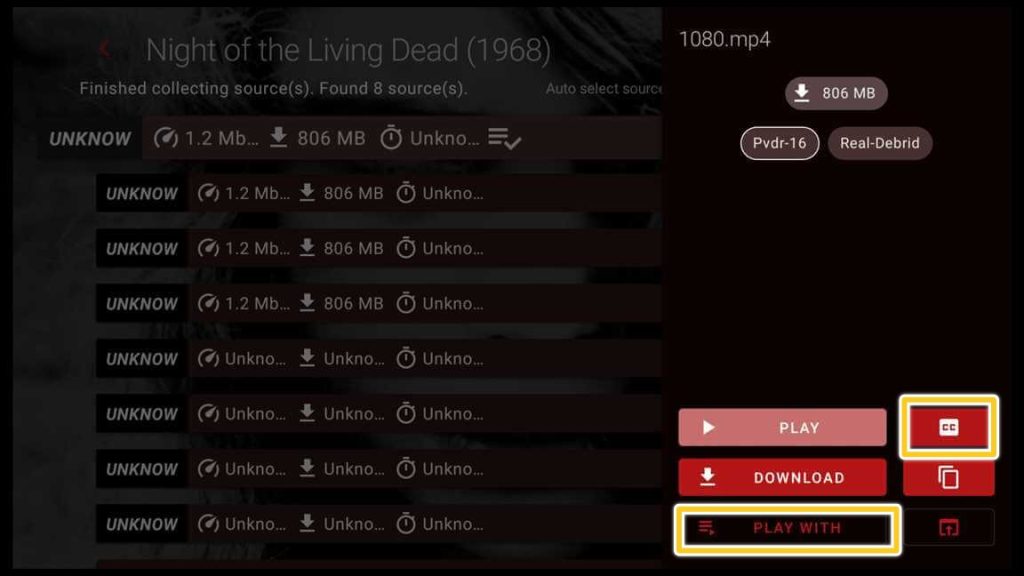
There are several buttons available. You have the option of either selecting the play button to start the movie or going for the cc button to watch the movie with subtitles.
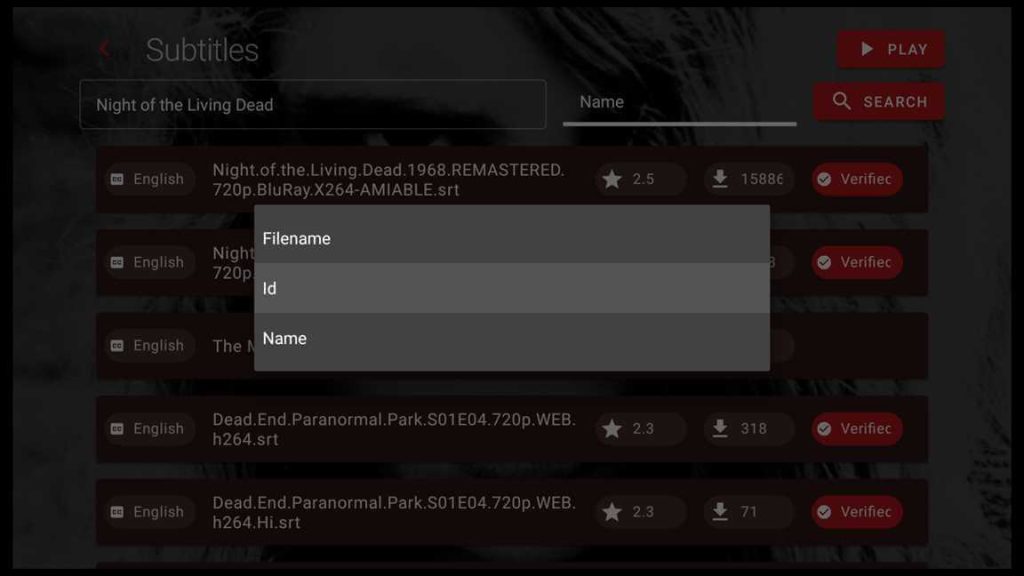
Here you’ll have multiple subtitles available. Just choose one of them.
If no subtitle is available by its Filename, you can choose to search for the movie subtitle by its ID or Name.
Well done! You may now return and search for your favorite movie.
How to Set an External Player as the Default Player for Syncler
To play a movie on Syncler with a player different than the in-built player, choose the PLAY WITH button before playing the movie.
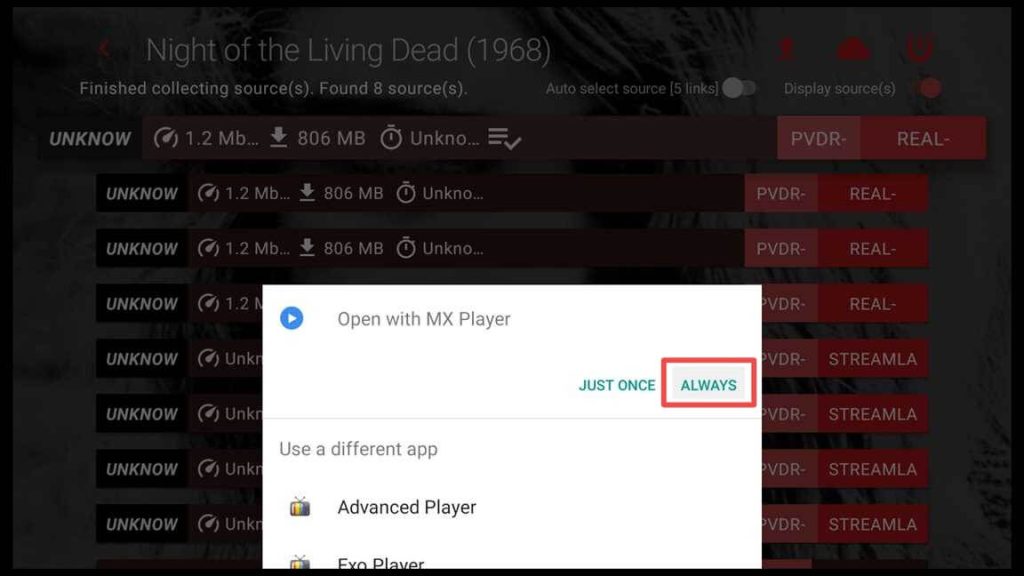
After selecting MX Player, I will click on the Always button, which will ensure that all movies or TV shows will be automatically played with MX Player from now on.
To Wrap it up
Organizing and tracking your favorite movies, TV shows, and anime can be a daunting task, but imagine having a single application that enables you to do it all seamlessly.
Syncler is an application that provides everything a movie or TV show enthusiast needs, with a comprehensive guide that covers everything from start to finish.
This guide is specifically designed for new users who are installing apps on FireStick for the first time. Once you become familiar with Syncler, you’ll find that there’s no need for another movie or TV app.

